Overview : Configurations
Within Zimyo HRMS configuration, the admin conducts essential setup in the organization unit. The form library enables the creation and management of company forms like Joinee, Assets, Exit interview, and Requisition forms. Additionally, the property library allows the admin to import properties and customize the dashboard for enhanced flexibility.
Organization unit
The Organization Unit entails essential organizational configurations that the admin needs to establish prior to other settings in Zimyo HRMS. This section allows the admin to manage branches, business units, channels, cost centers, departments, entities, employee types, etc.
Configuration is achieved by clicking the three dots(⁝) on the right side of the screen, with the added authority to hide these settings from the menu.
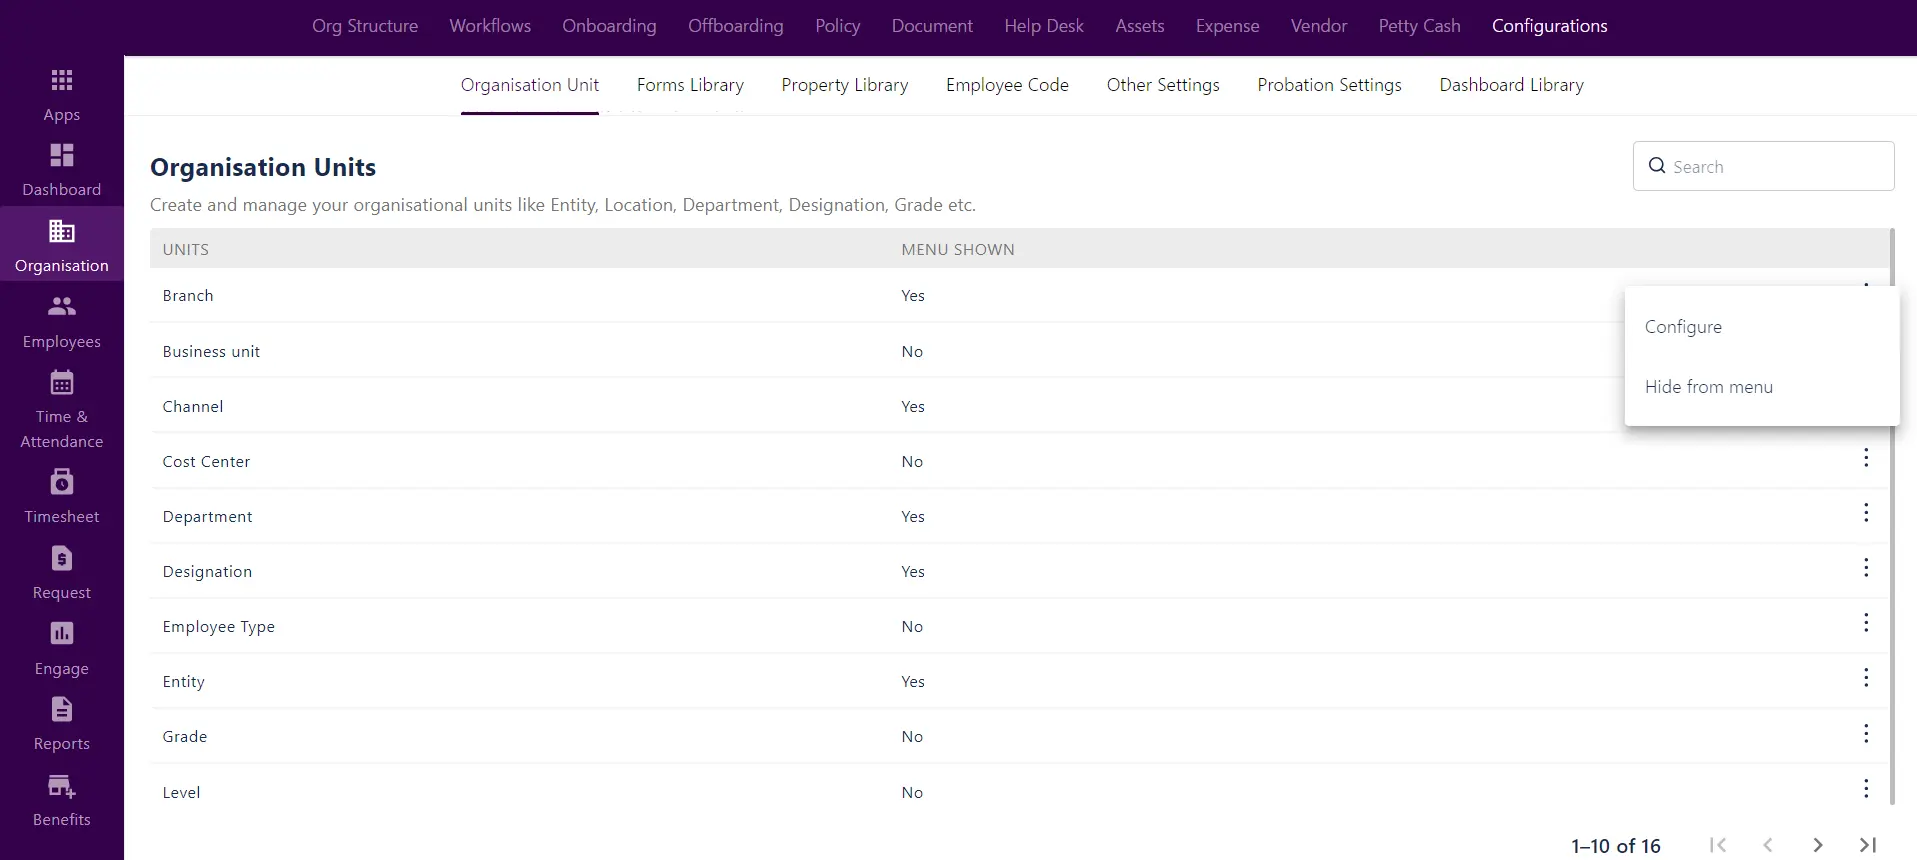
Clicking on “Configure” provides the admin with a comprehensive overview of properties. The admin can import new properties and also designate fields as mandatory for enhanced customization.
Property Library
Create and manage properties, serving as input fields for various dynamic forms. These properties can be seamlessly imported into both organization units and the forms library, enhancing overall management efficiency.
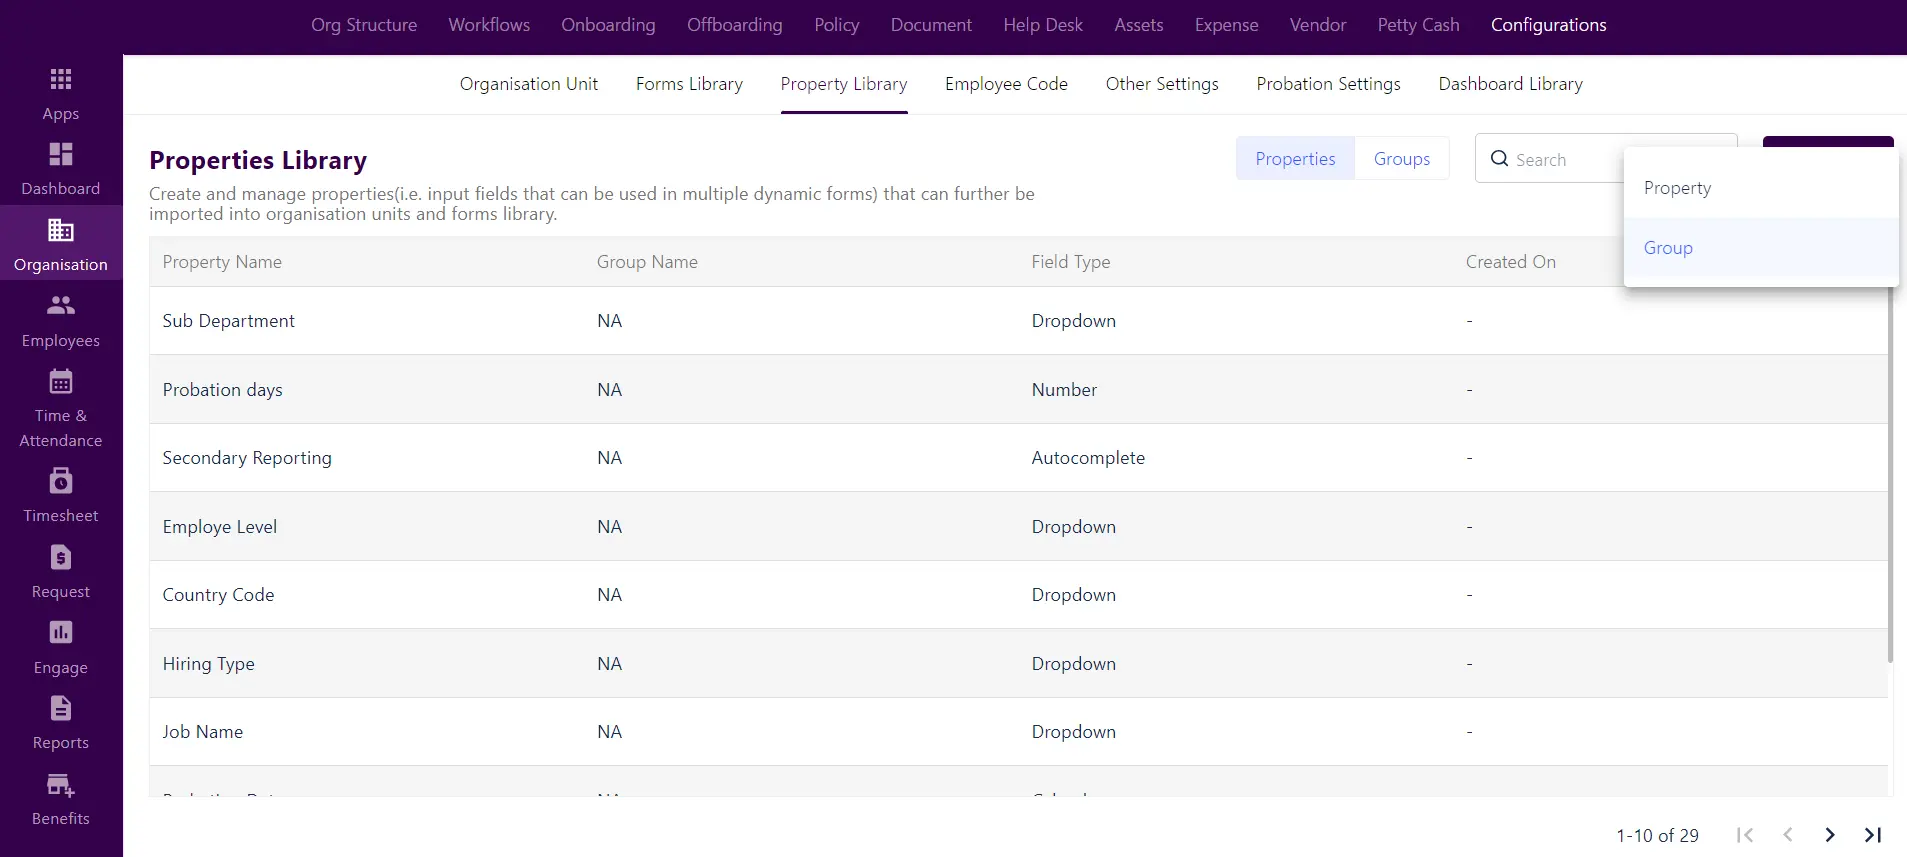
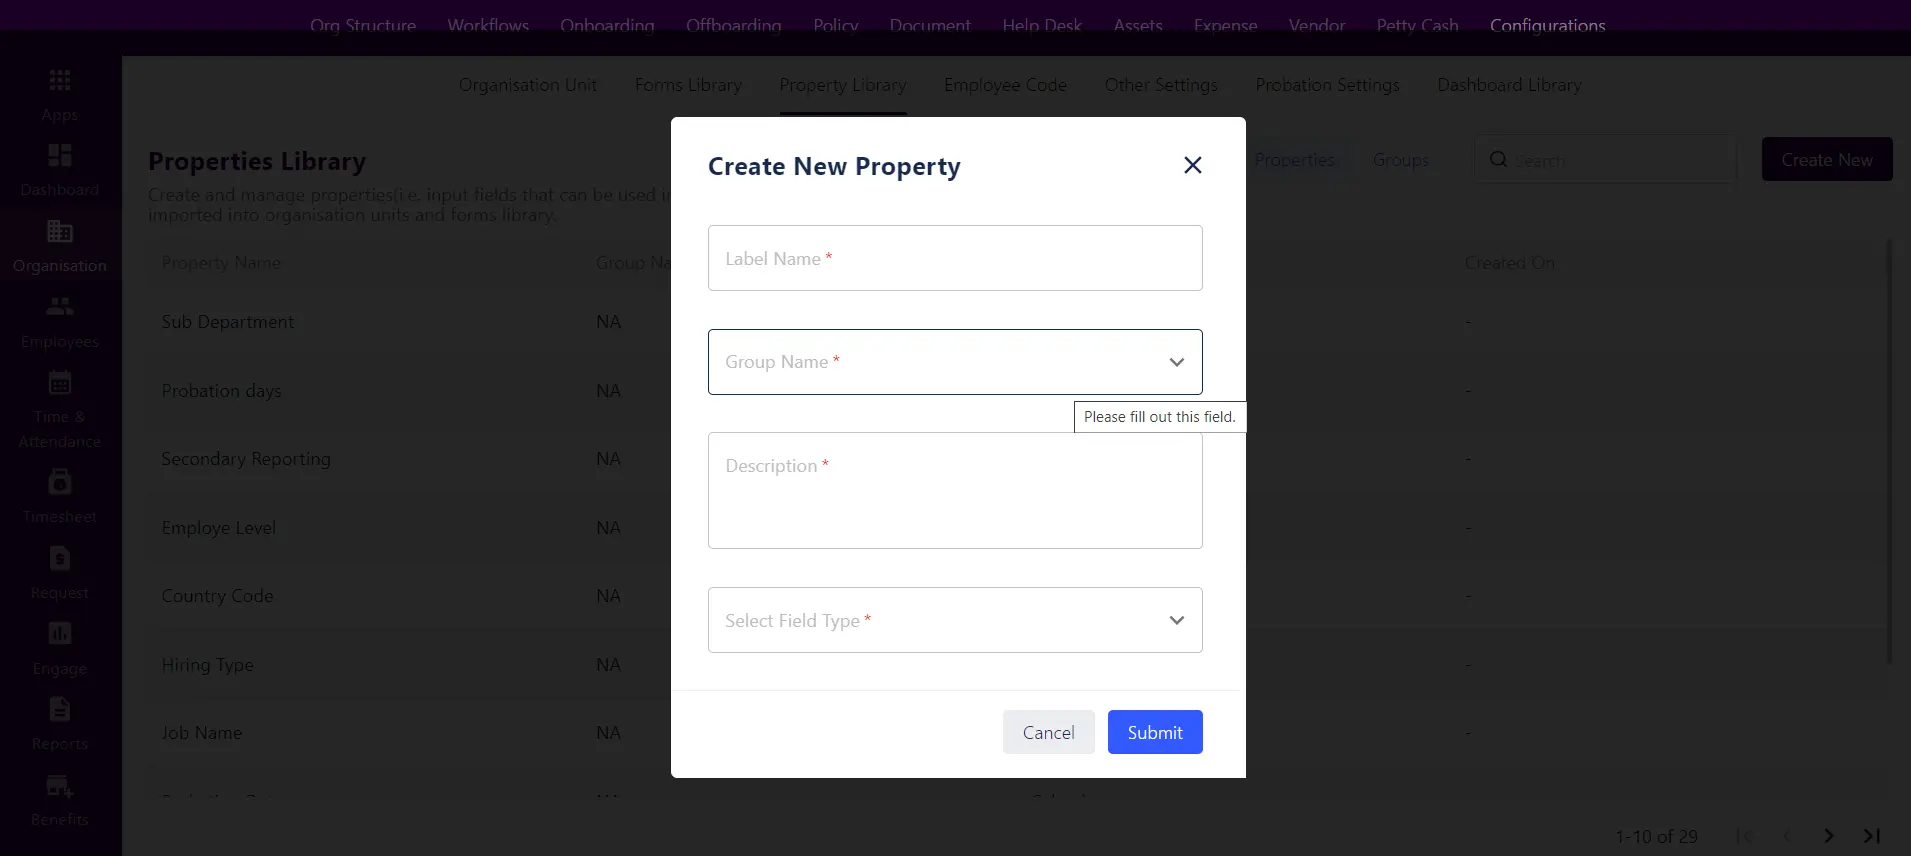
Clicking on “Create New” presents two options: creating a property or forming a group.Within the “Create Property” option, the admin can generate multiple properties that offer dynamic usage within forms.
Forms Library
Create and manage all your company’s forms here, like, the Joinee form, Assets form, Exit interview form, Requisition form, etc.
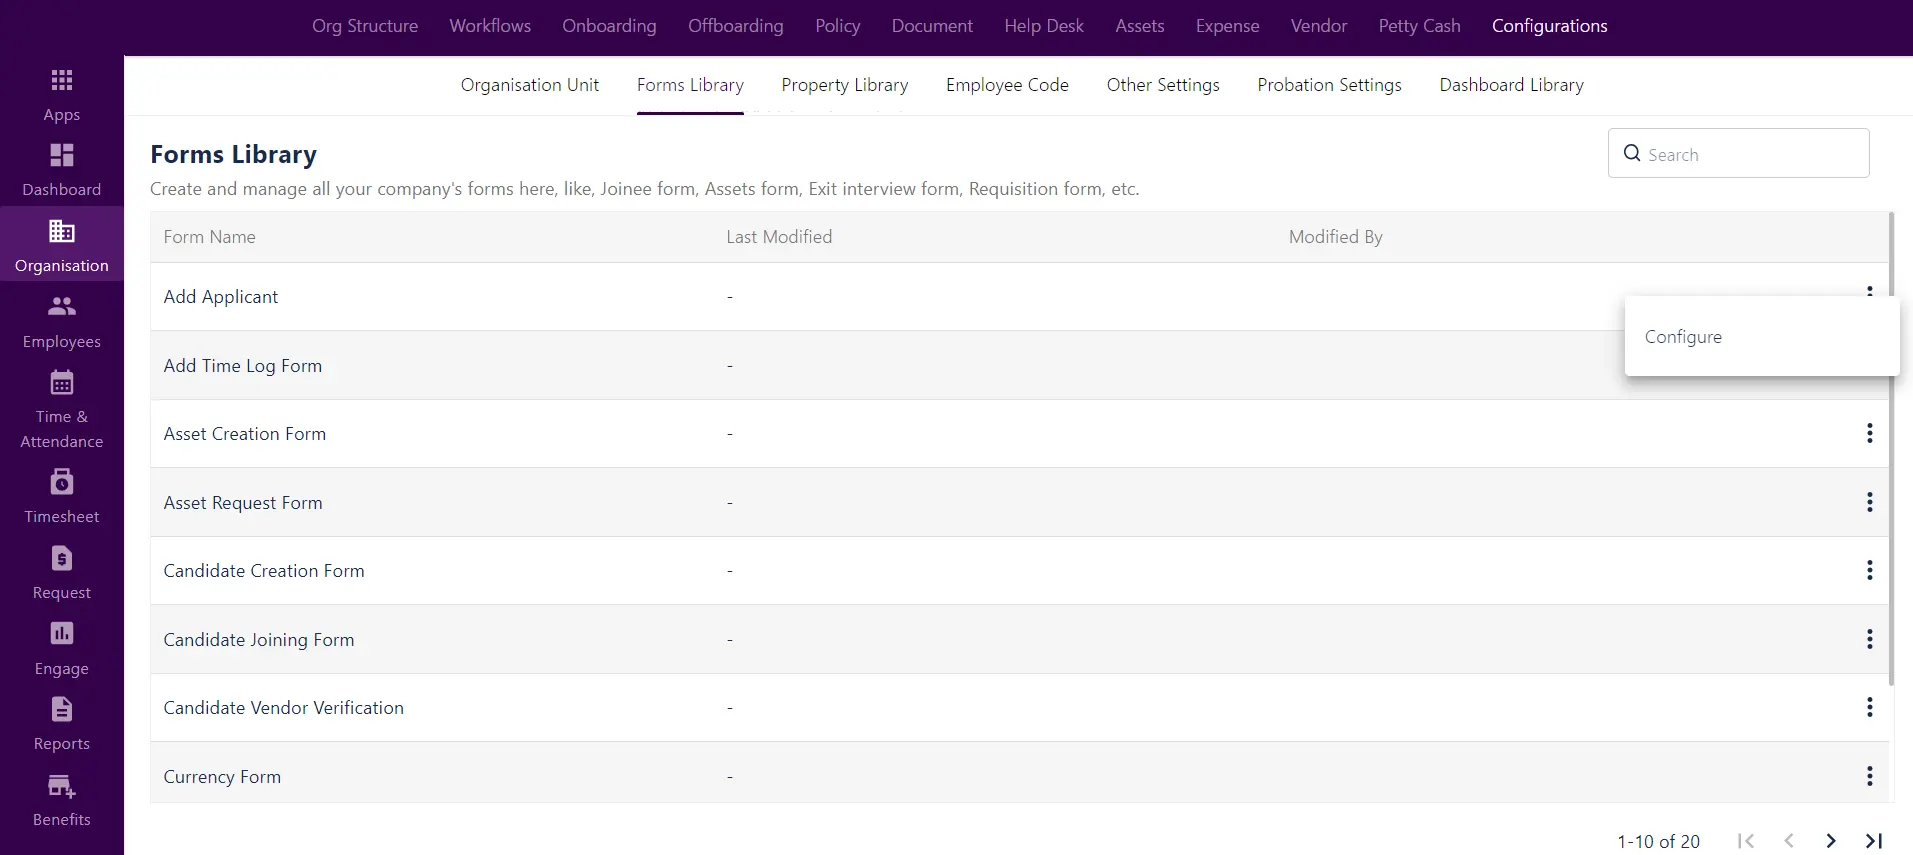
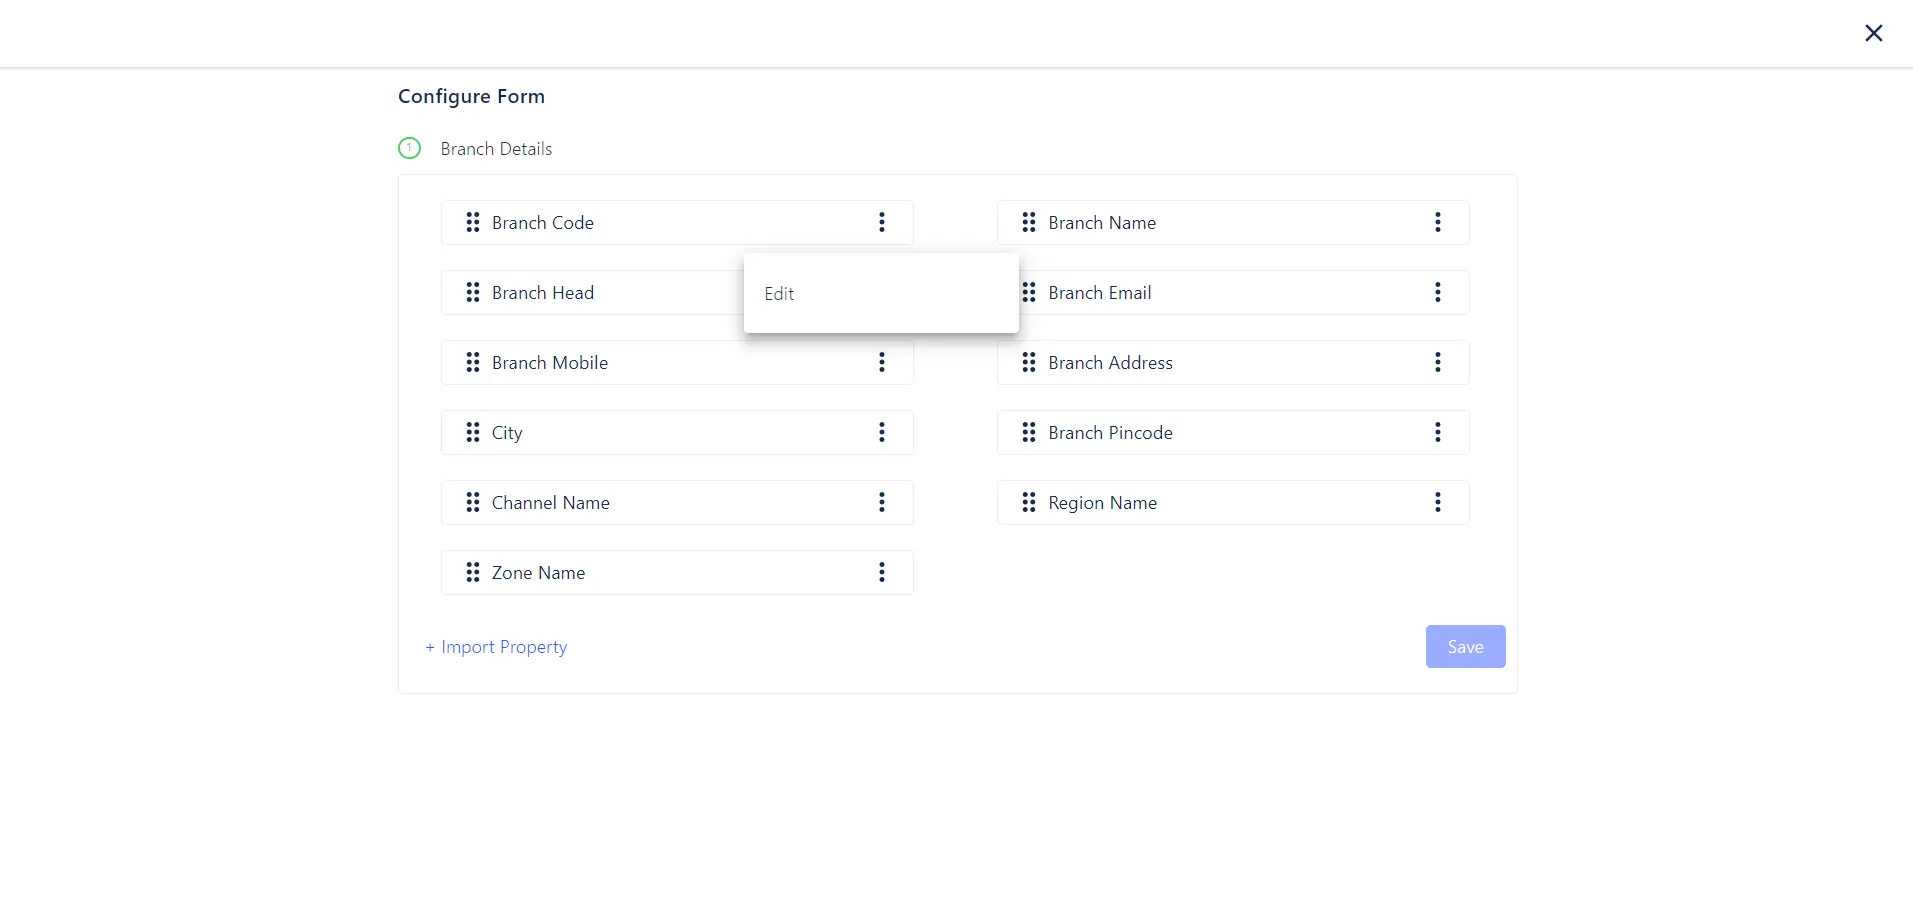
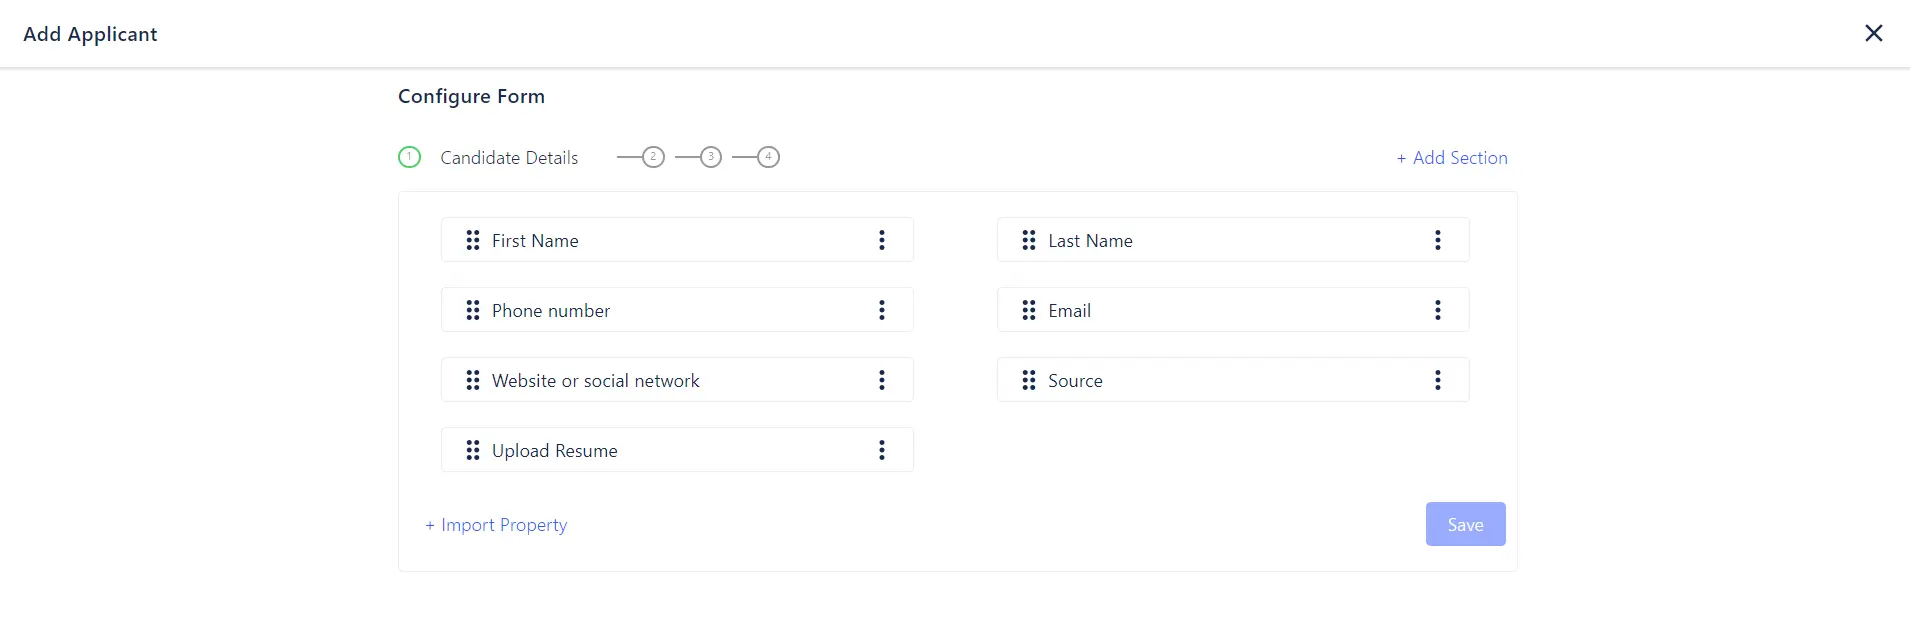
Clicking on the three dots allows the admin to configure the form, enabling the addition of new properties or sections to that specific form.
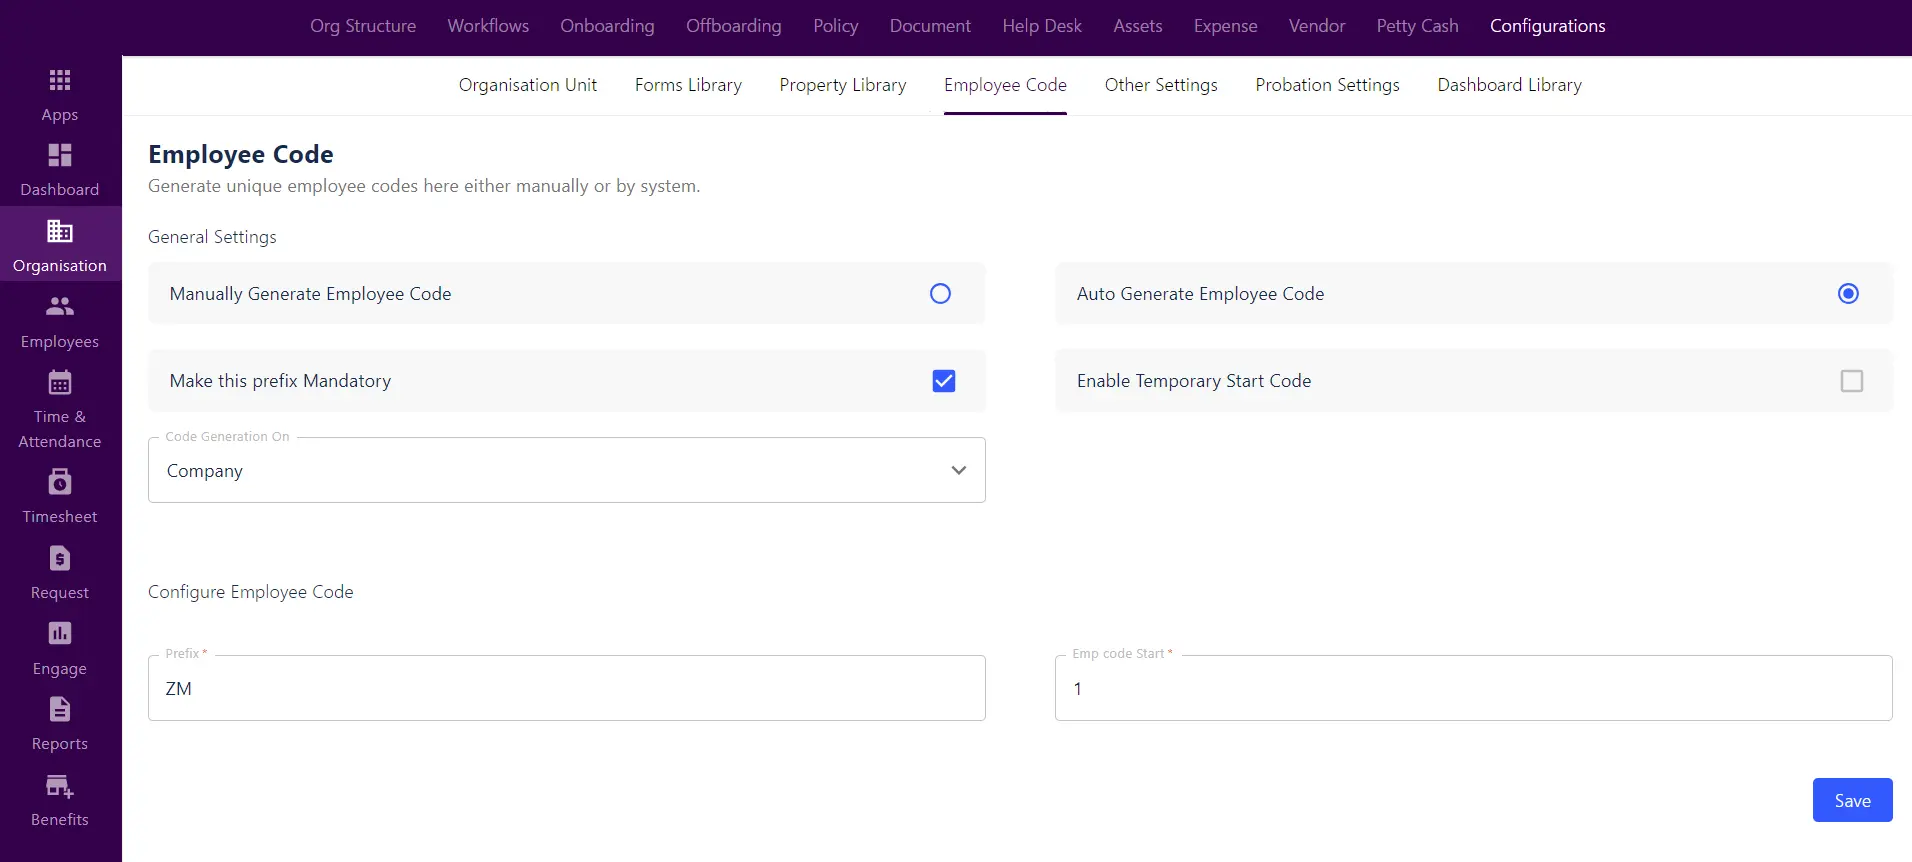
Employee Code
Within the Employee Code section, the admin has the option to manually generate employee codes or utilize an auto generated process here, the admin can establish the prefix and specify the starting number for employee codes in this section.
Other Settings in Configurations
Within the “Other Settings” section, you’ll find general, employee, geofencing, and mobile app settings. Admins can activate the profile checker, enable document digital signatures, and manage Employee Data Visibility Control and two-factor authentication. These settings apply across all modules.
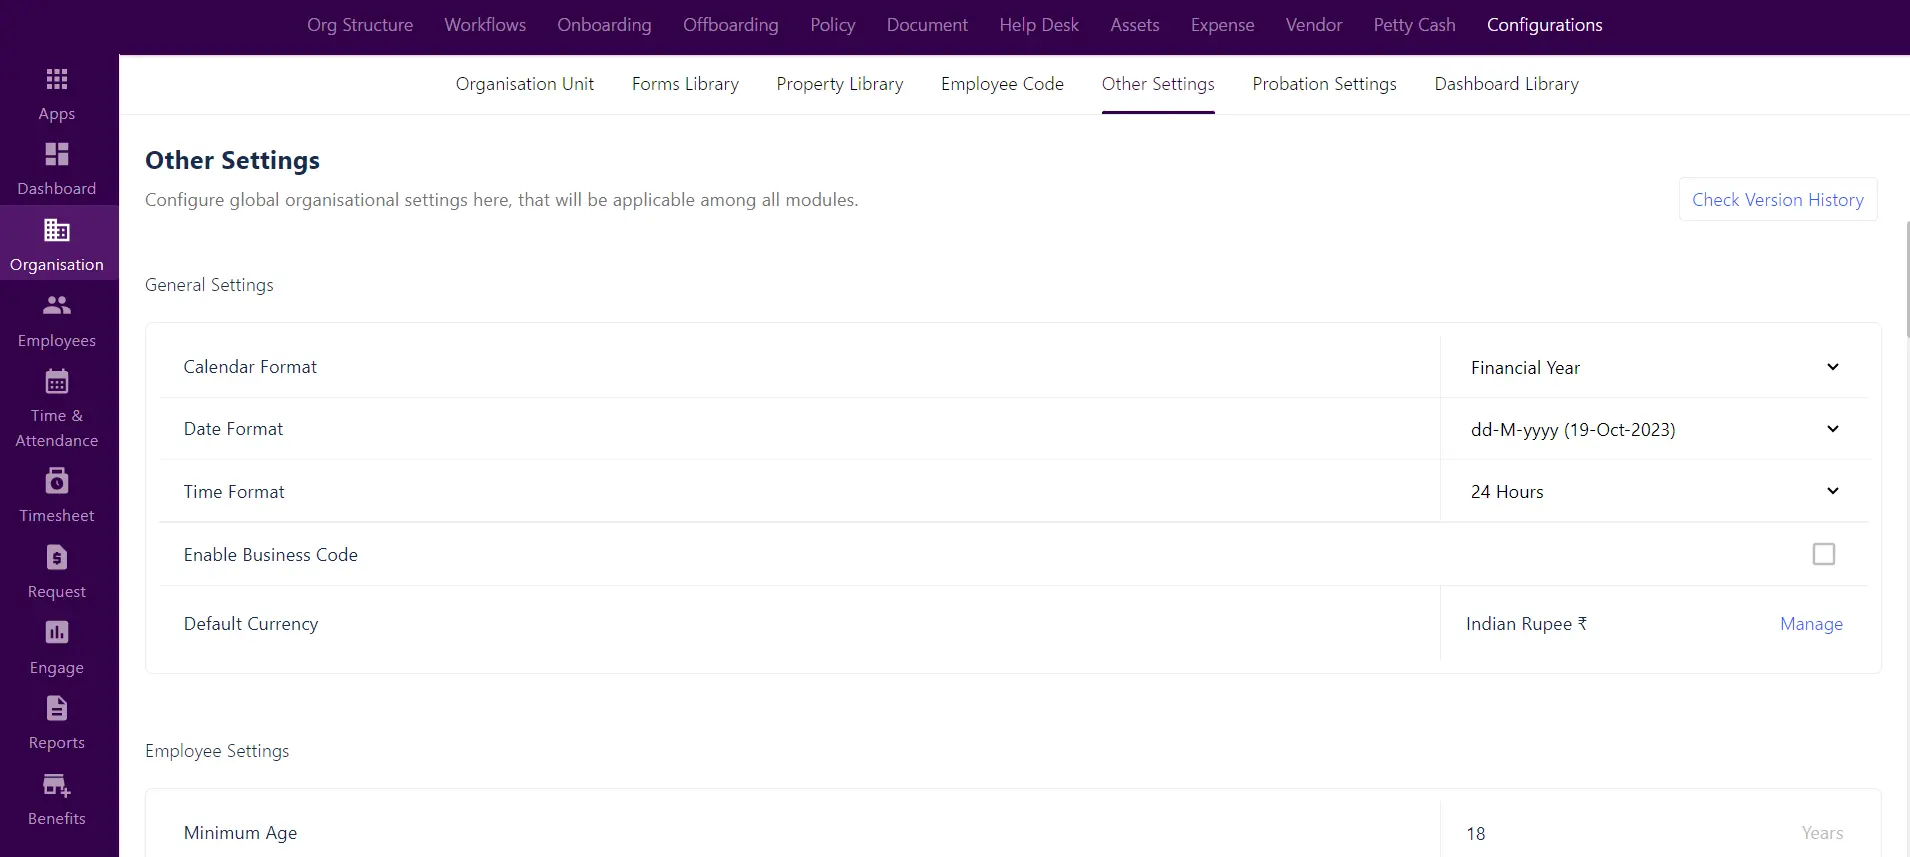
General Settings
Within general settings, the admin can oversee fundamental organizational configurations, including calendar preferences, date and time format, activation of business codes, and establishment of the default currency.
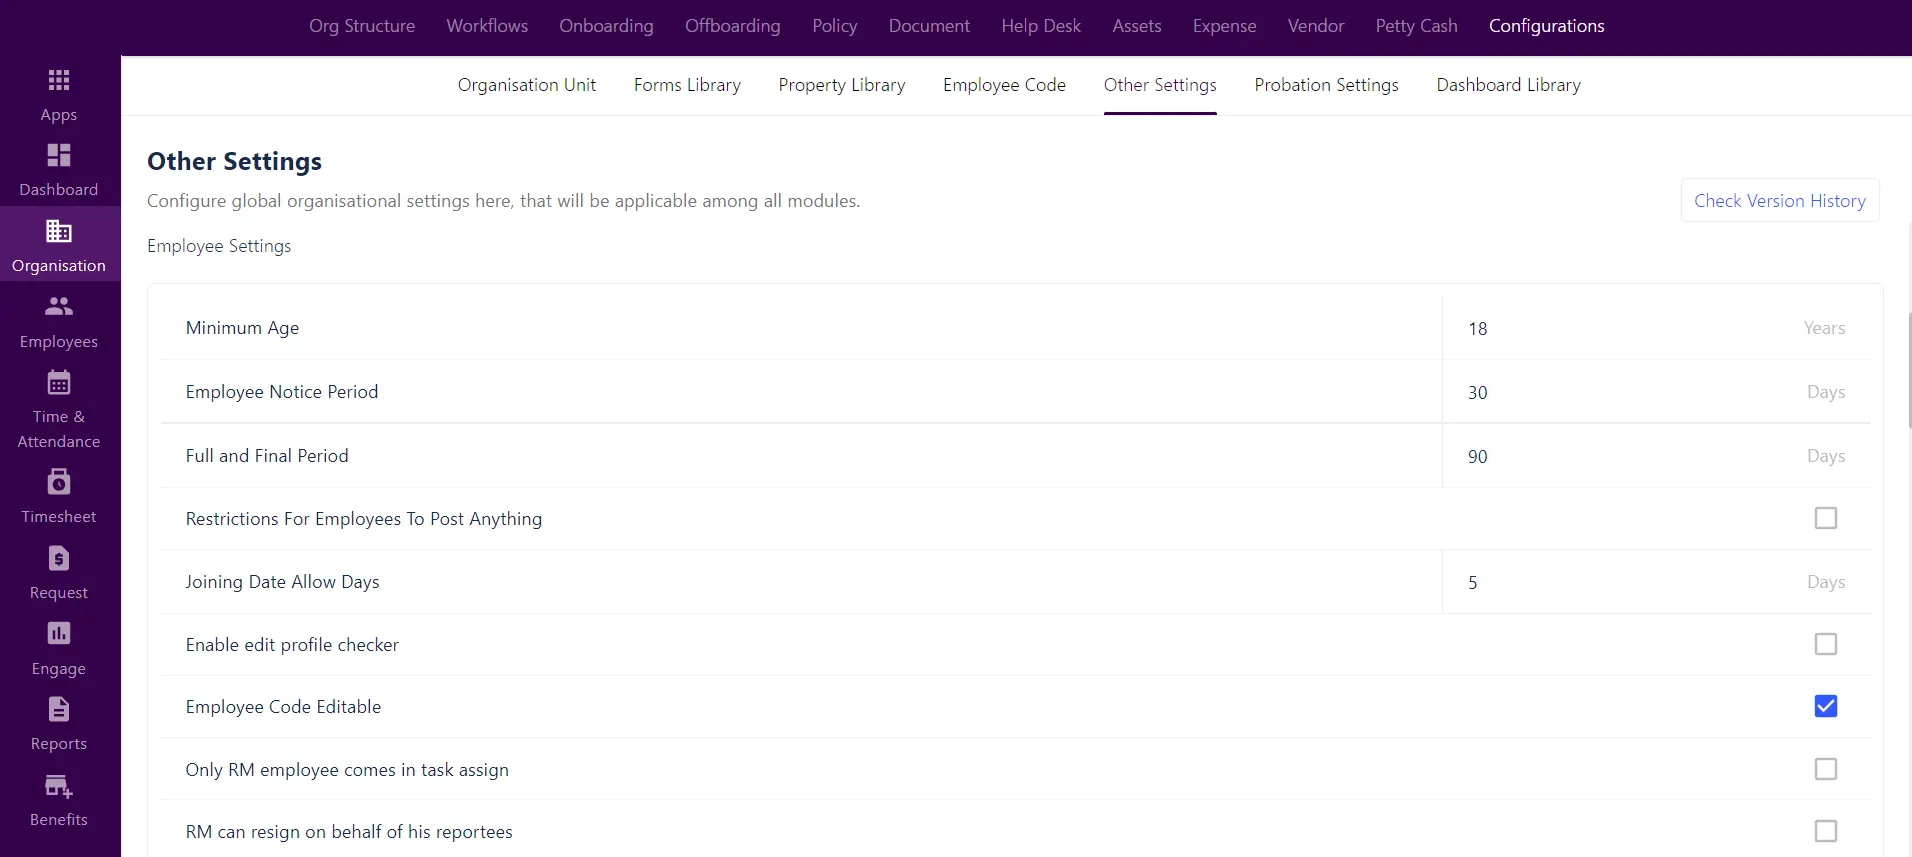
Employee Settings
In employee settings, the admin can define parameters such as minimum age, notice period days, full and final settlement period, and restrictions on employee postings. Additionally, the admin can grant reporting managers the exclusive ability to assign tasks and authorize them to resign on behalf of their team members.
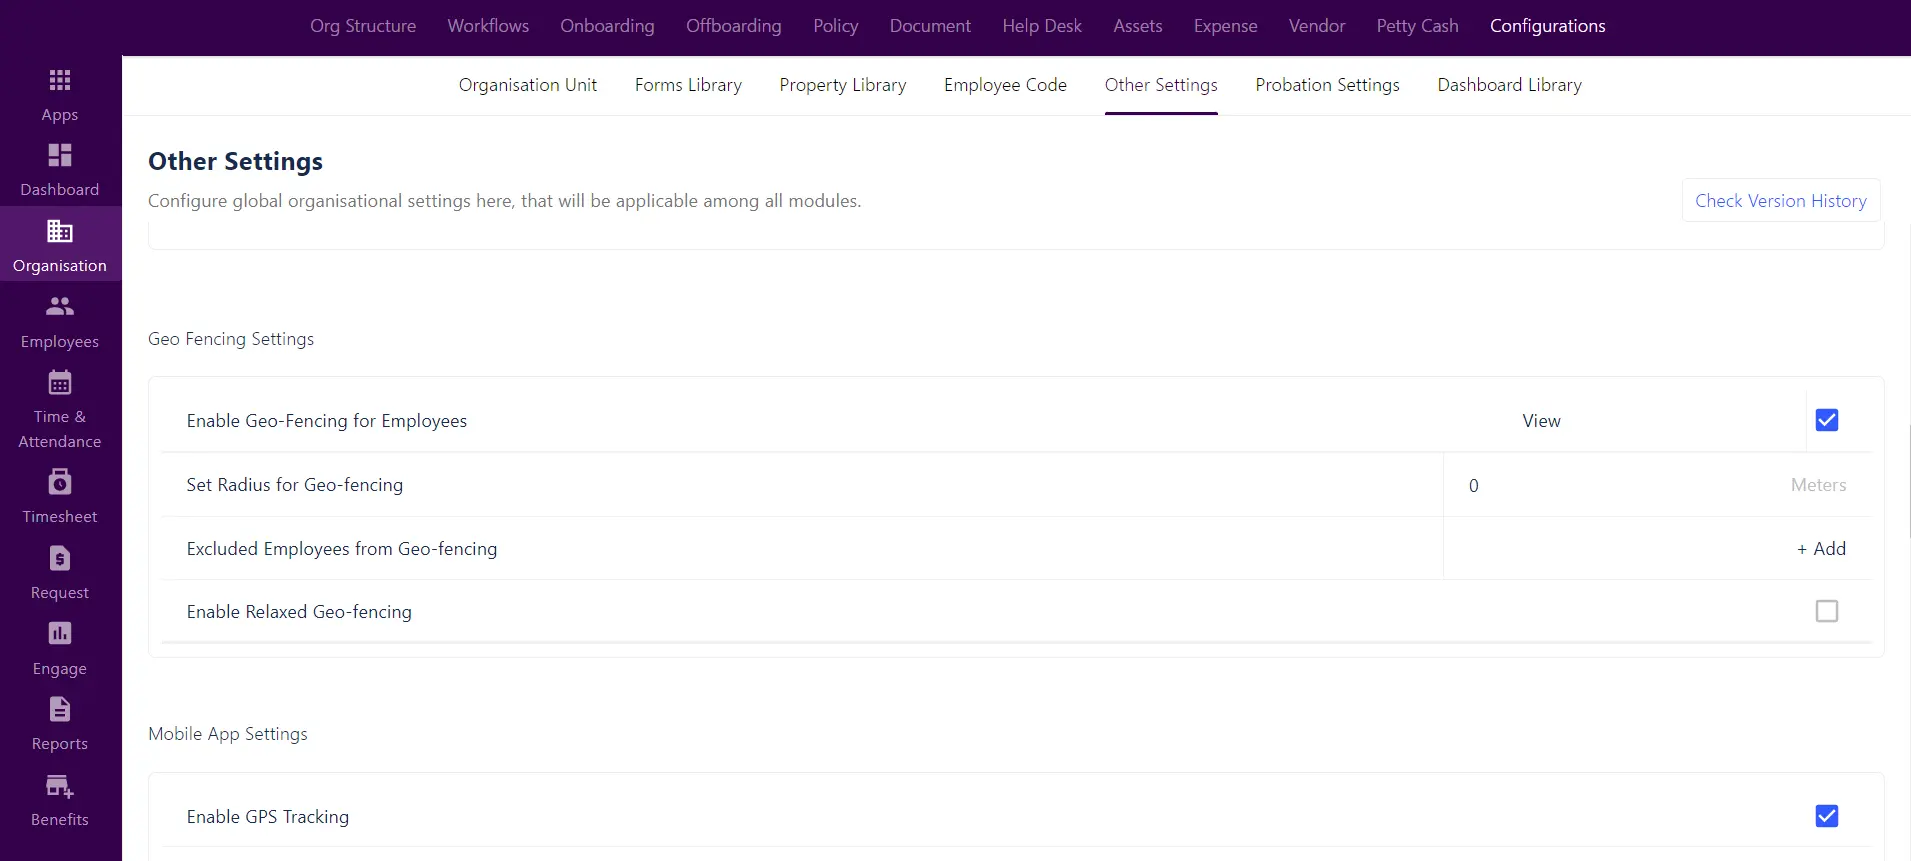
Geofencing Settings
Geofencing settings involve configuring parameters related to geographic boundaries and location-based restrictions within the system.
In this section, the admin can activate geofencing for employees, establish a specific radius, exclude certain employees from geofencing by adding their names, and enable relaxed geofencing for top management.

Mobile App Settings
In mobile app settings, the admin has the capability to enable GPS tracking, capture clock-in/clock-out punches in offline mode, mandate approval for marking attendance post punching, empower employees to create trips, display team attendance including reportees’ reportees, authorize reporting managers to change location and manage rosters. Additionally, there’s an option to restrict employees from starting and ending trips outside of their designated shift hours.
Here, the admin has the authority to modify the profile checker, perform LMS settings and activate digital signatures for documents.
Edit Profile Checker
In the profile checker, the admin can limit employees from making repetitive changes to details already provided by them.
Employee Data Visibility Control
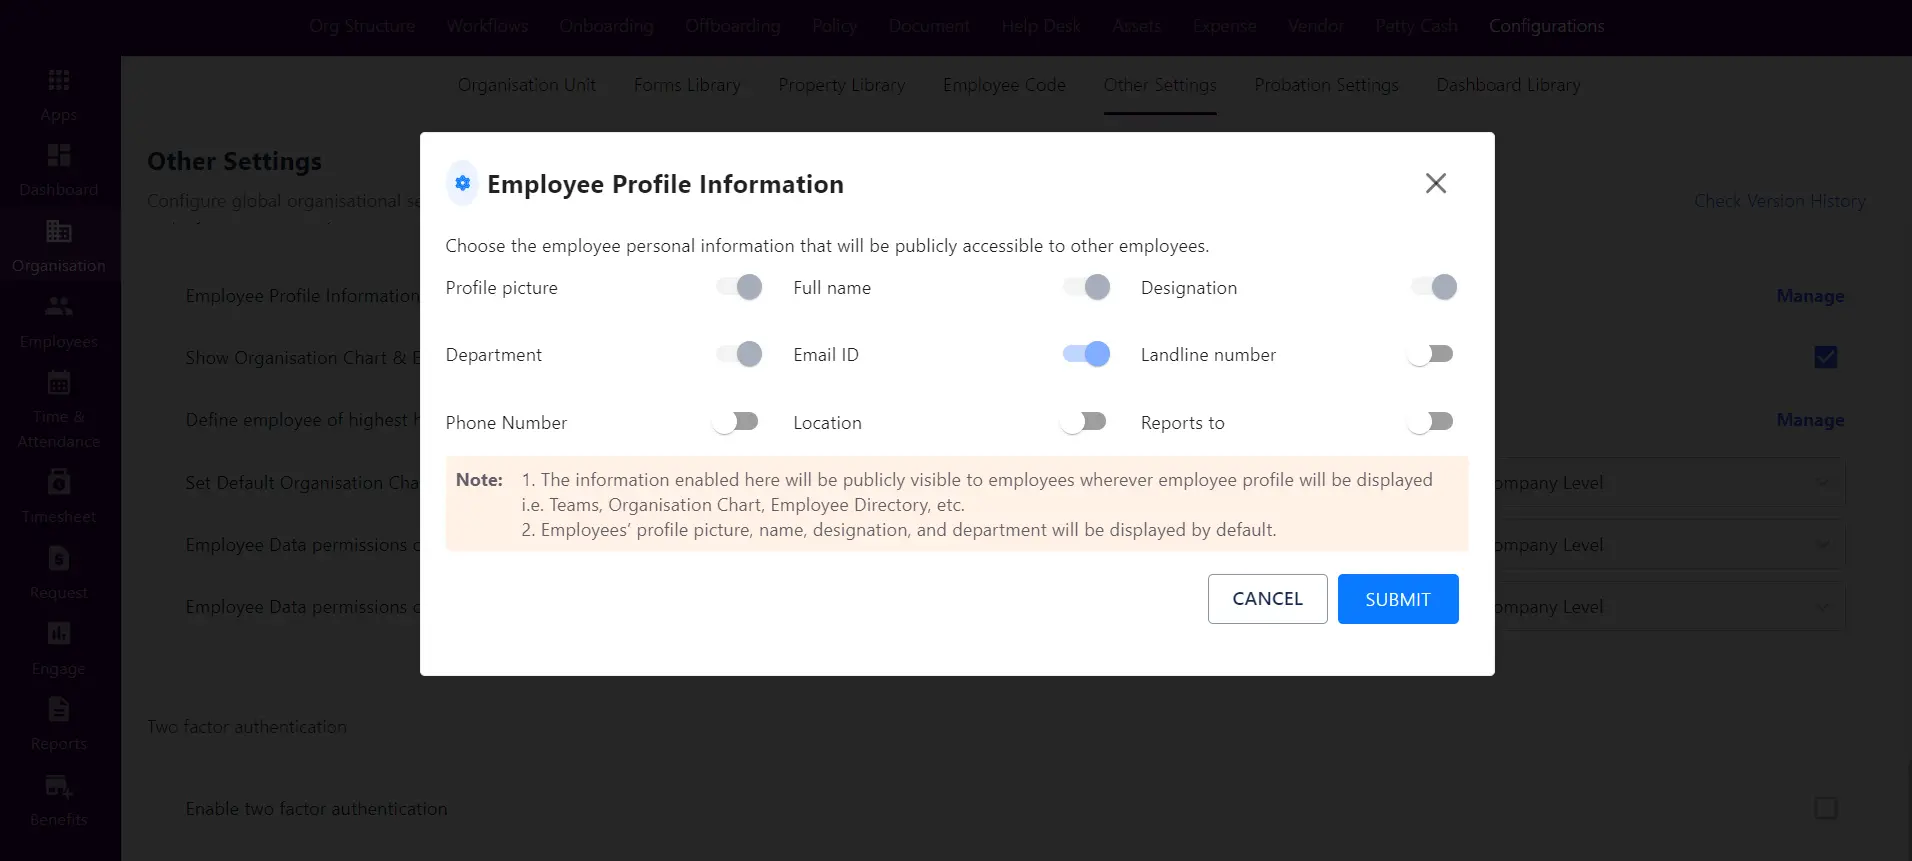
Within Employee Data Visibility Control, the admin can oversee and manage employee profile information. By selecting “Manage,” the admin can determine which personal details of an employee will be publicly accessible to others. The enabled information will be visible in areas like Teams, Organization Chart, Employee Directory, etc. The default display includes employees’ profile pictures, names, designations, and departments.
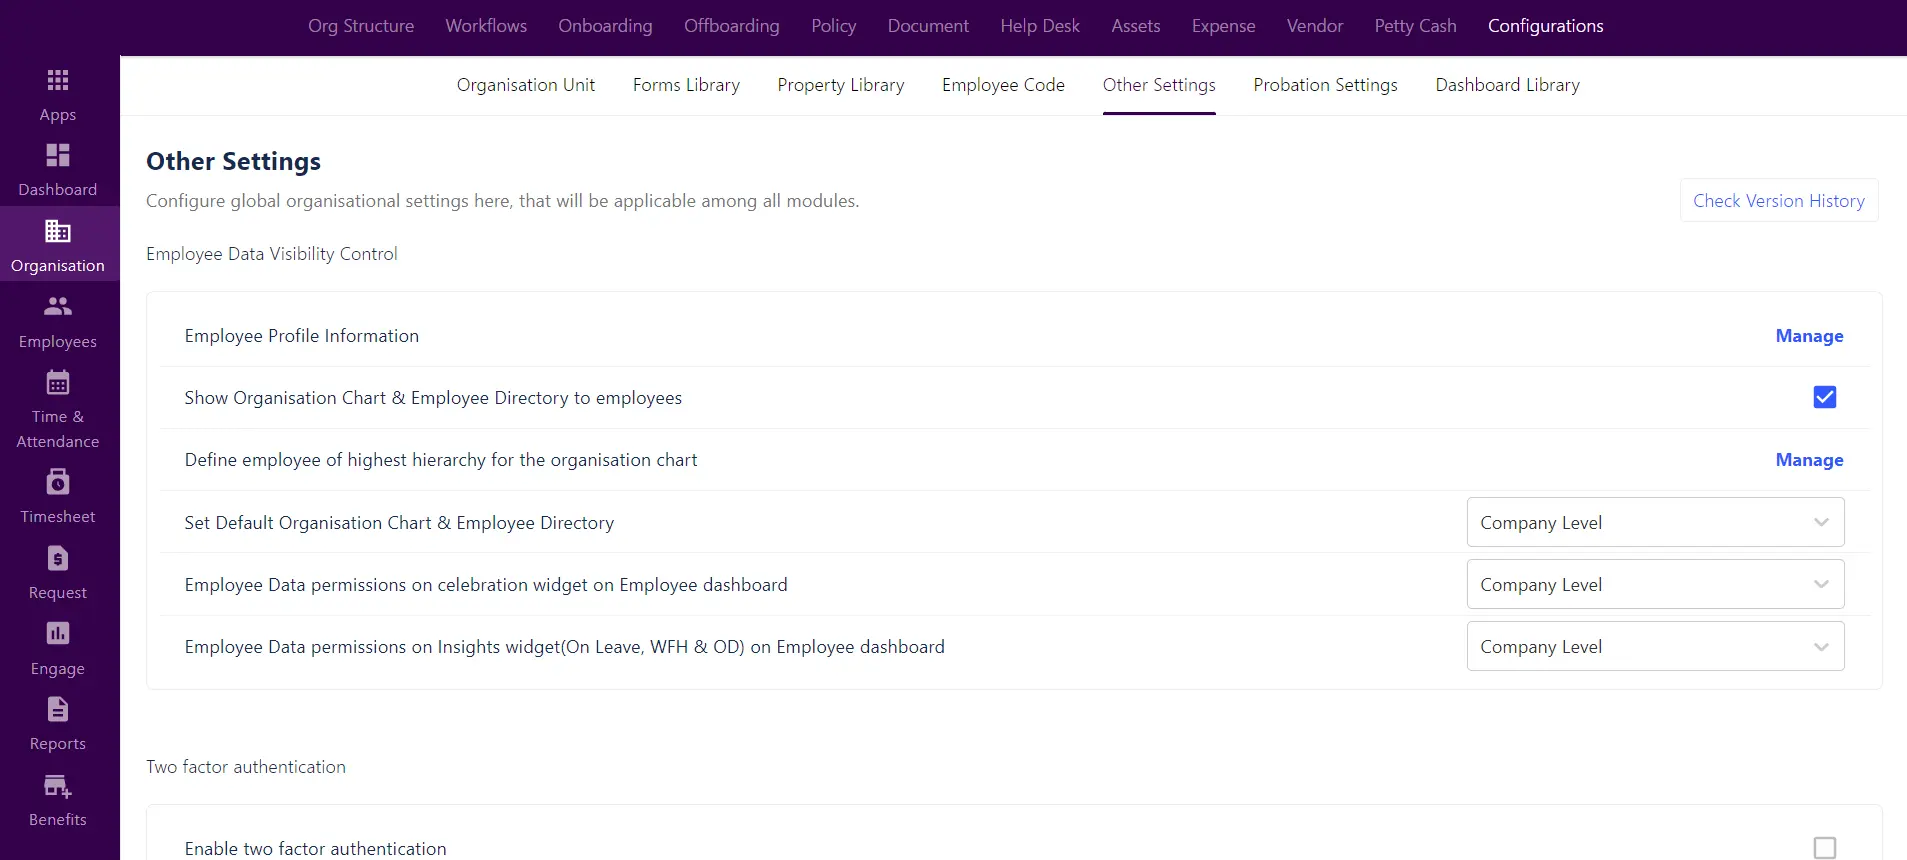
The admin can configure the visibility settings for the Organization Chart and Employee Directory. They can also set Employee Data permissions for the celebration widget on the Employee dashboard, as well as for the Insights widget (On Leave, WFH & OD) at the company, entity, and location levels.
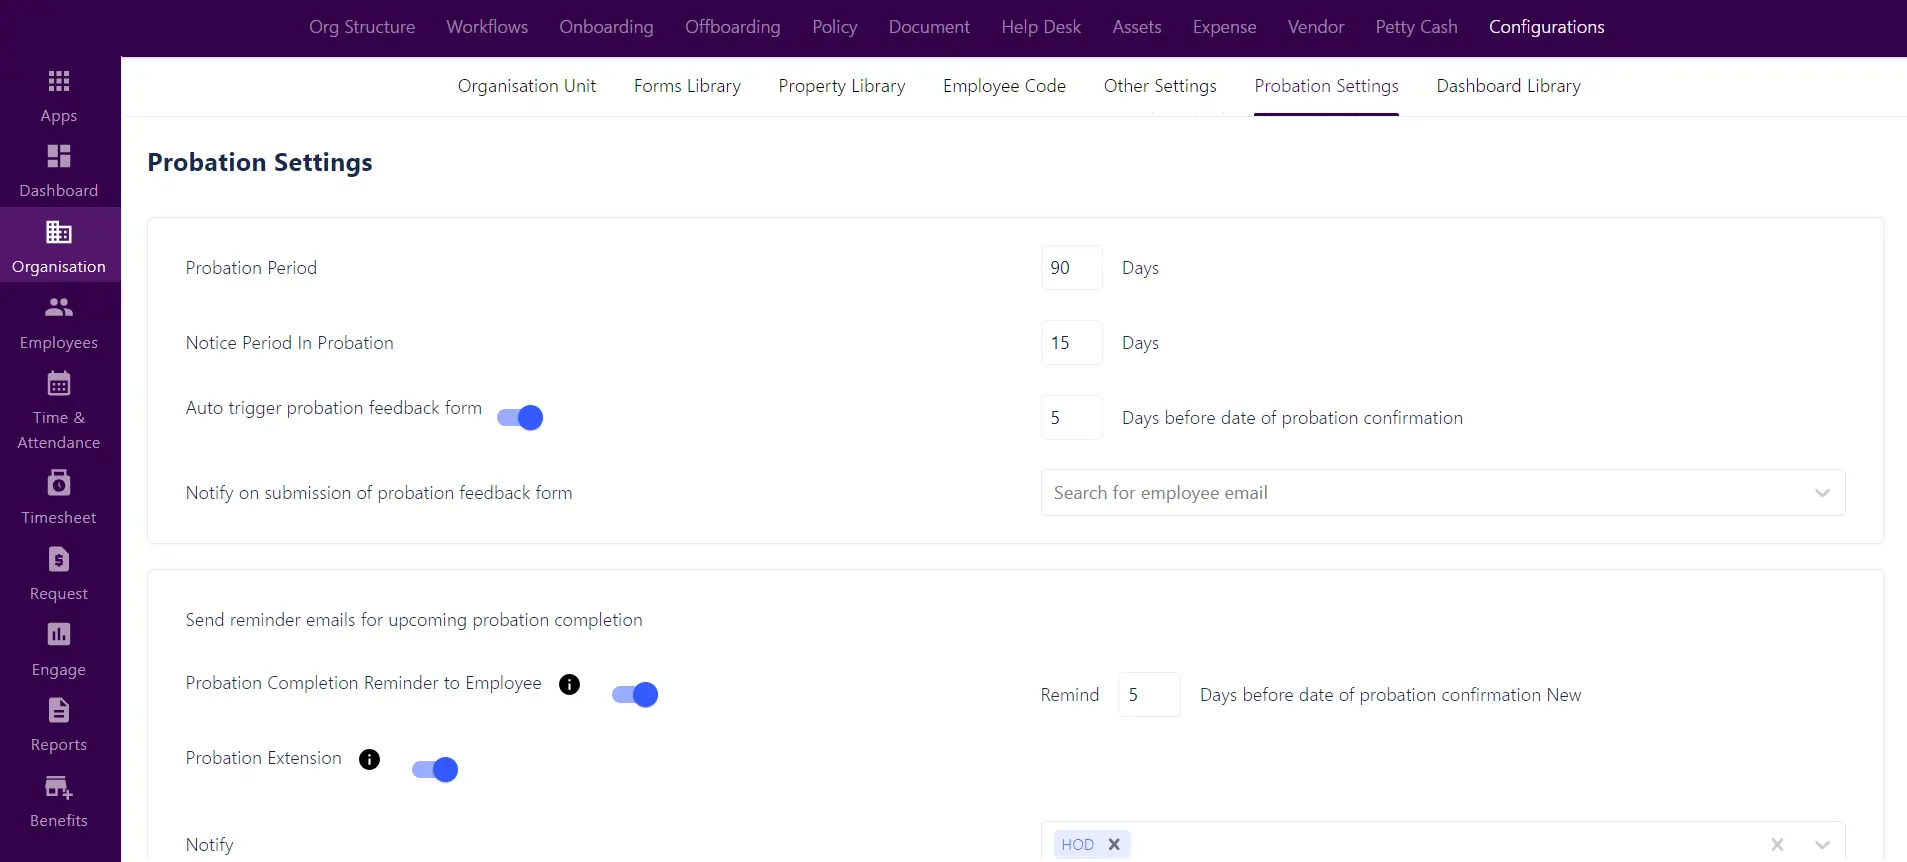
Probation Settings
In a probation setting, the admin can control and oversee aspects such as the probation period and notice period. The admin also has the option to activate the Auto-trigger Probation Feedback Form and configure it through the form library. Additionally, the admin can set up reminder emails for probation confirmation using the email library.
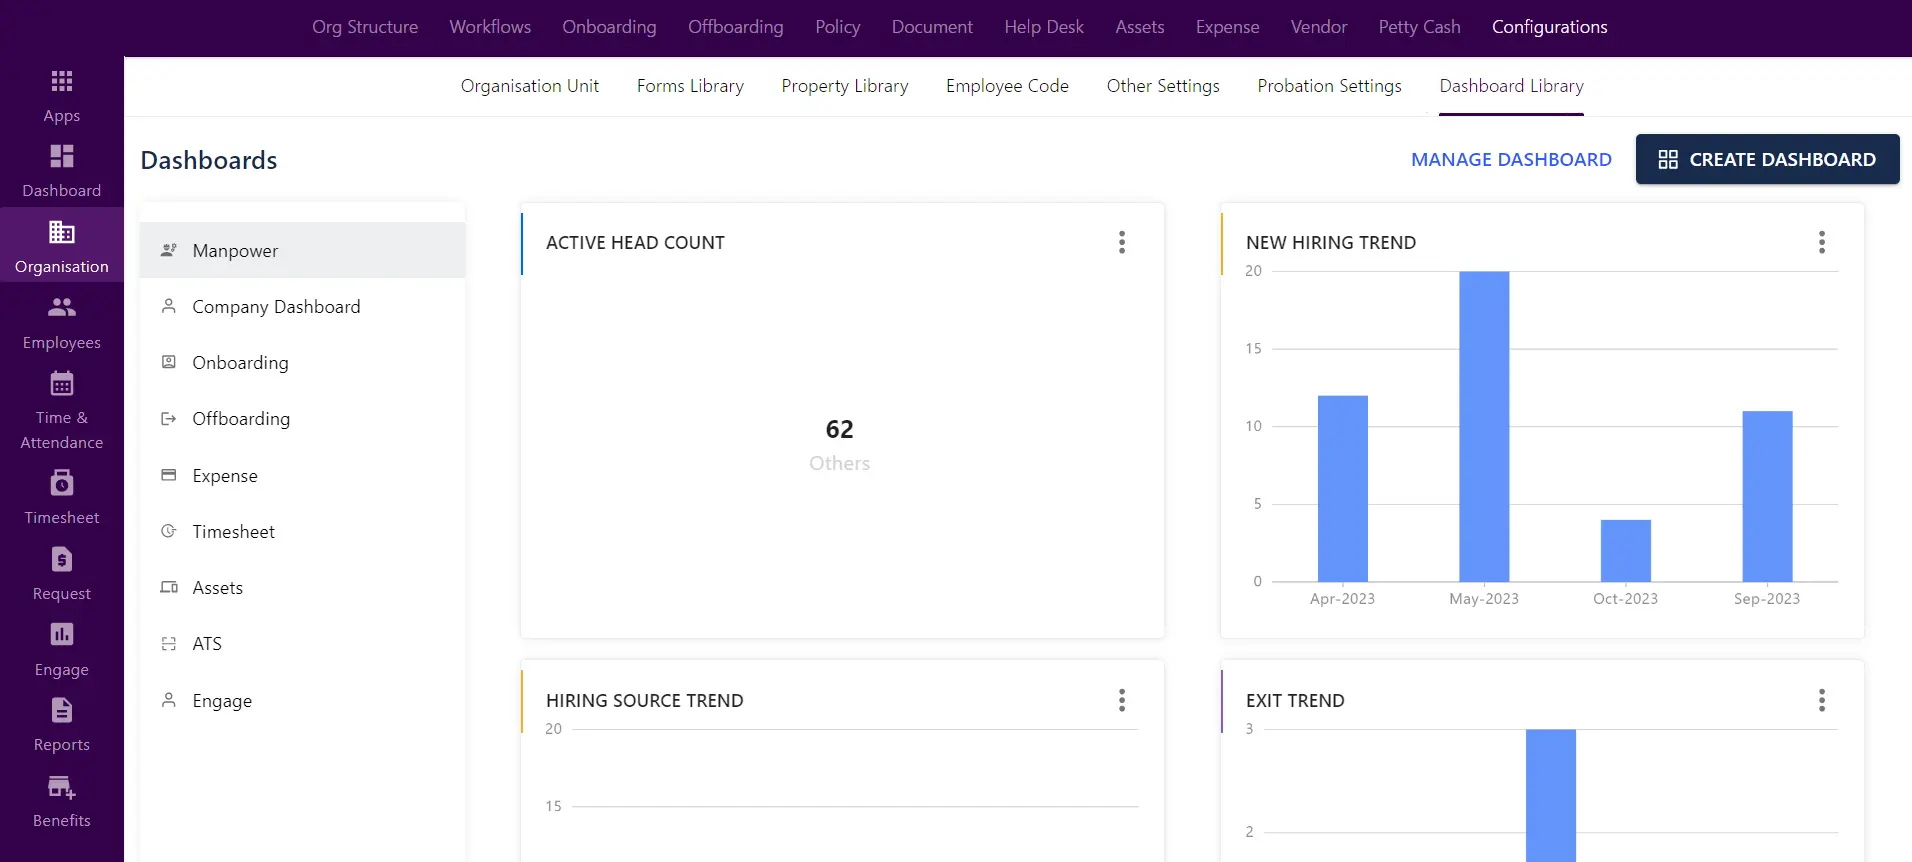
Dashboard Library
In the Dashboard Library, the admin has the authority to create and oversee dashboards for various modules, including ATS, Onboarding, Offboarding, Company Dashboard, and more.
Clicking on the three dots(⁝) allows the admin to incorporate the created dashboards onto the main page of various modules.
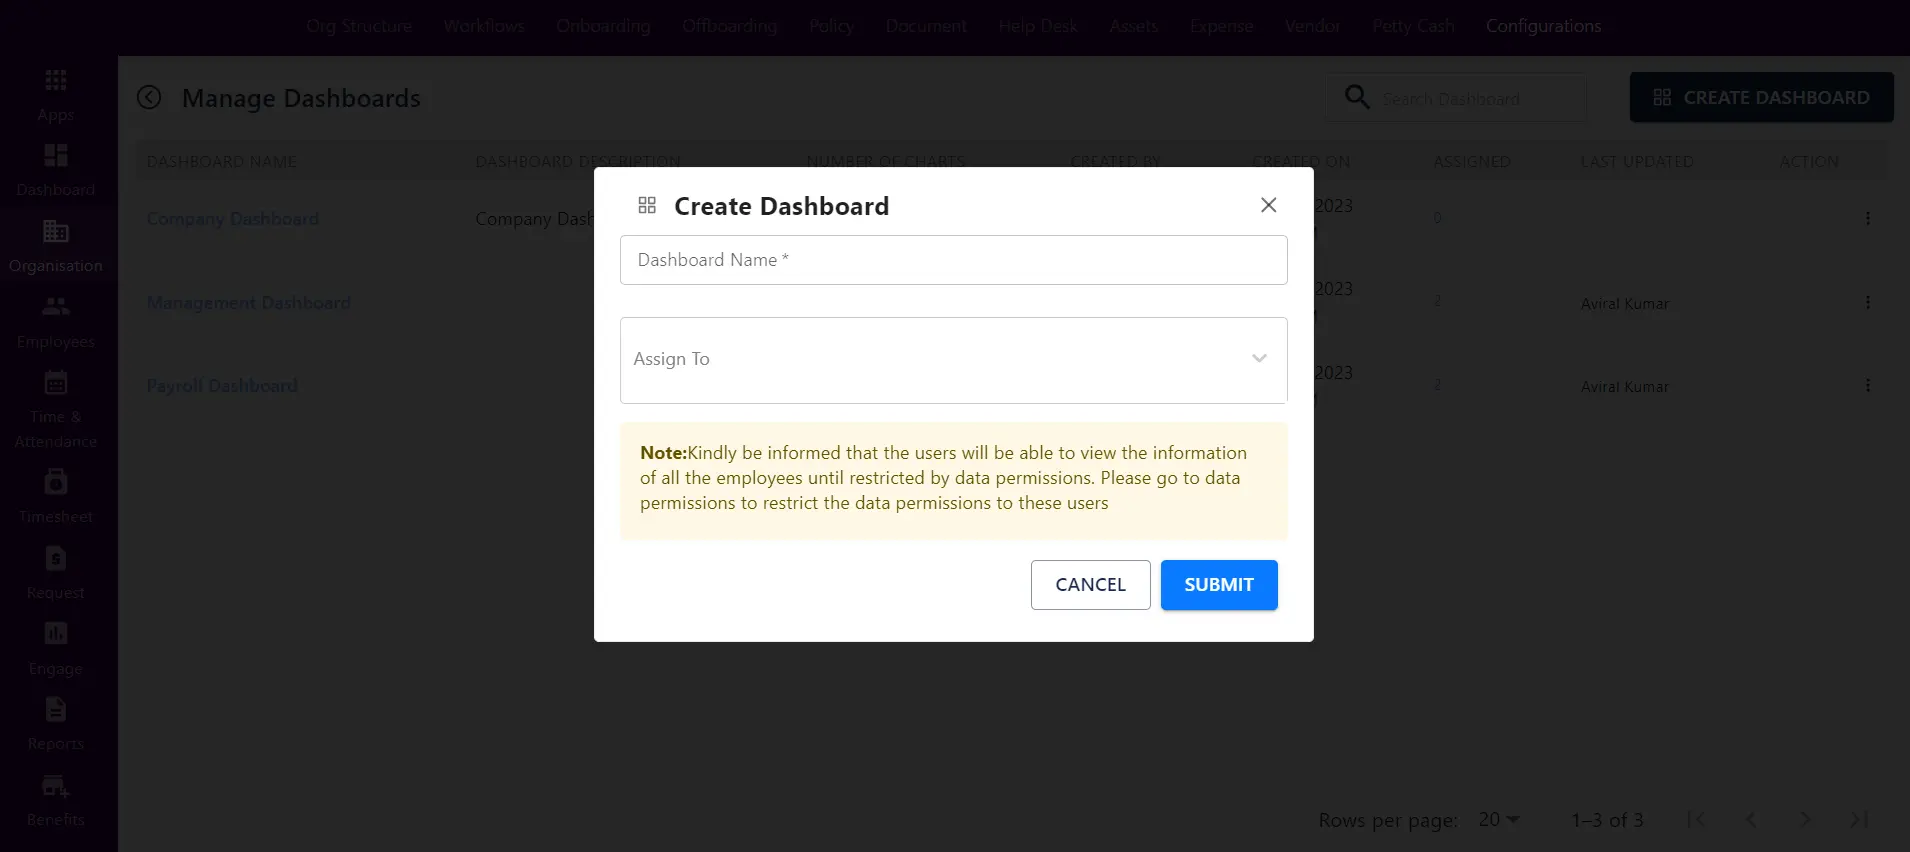
Note: Kindly be informed that the users will be able to view the information of all the employees until restricted by data permissions. Please go to data permissions to restrict the data permissions to these users