Vendor
- Dashboard Overview
- My Vendors
- Total Vendor Expense → Example: ₹356
Request Type and Total Request
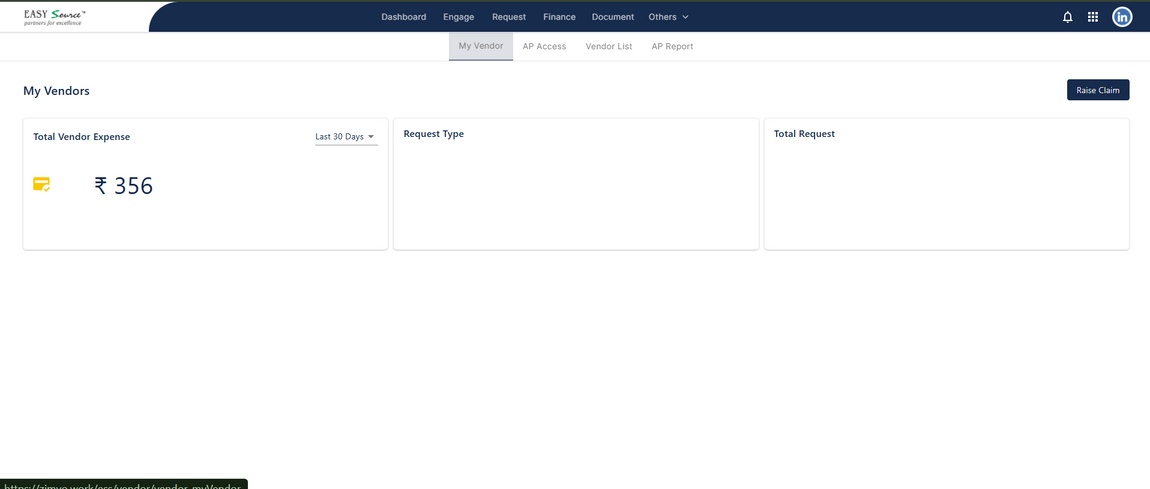
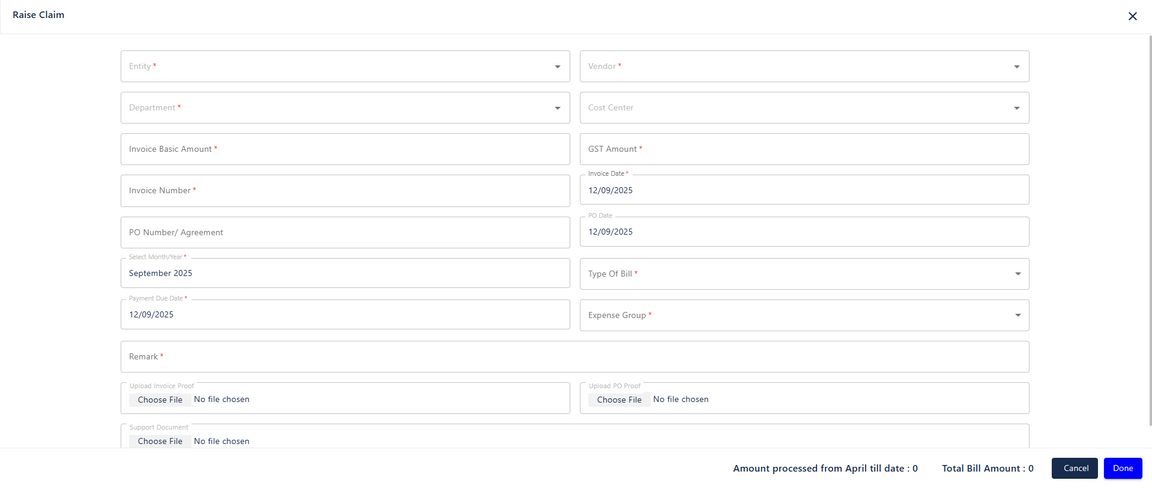
Action: Raise Claim
Clicking on Raise Claim opens a detailed claim form where the employee can submit expenses against a vendor.
- Raise Claim Form Fields:
- Entity *
- Vendor *
- Department *
- Cost Center
- Invoice Basic Amount *
- GST Amount *
- Invoice Number *
- Invoice Date * (e.g., 12-Sep-2025)
- PO Number/Agreement
- PO Date
- Select Month/Year * (e.g., September 2025)
- Type Of Bill *
- Payment Due Date *
- Expense Group *
- Remark *
- Uploads:
- Invoice Proof
- PO Proof
- Support Documents
- System Display:
- Amount processed from April till date: 12/02/2025
- Total Bill Amount: 2000
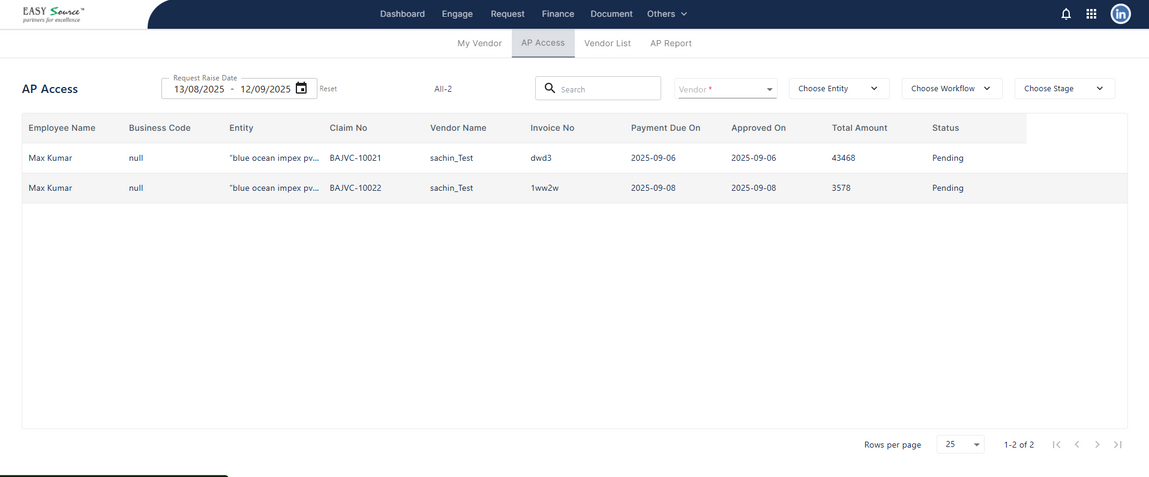
Ap Access
- Filters:
- Request Raise Date (Date Range)
- Search (Vendor, Employee, Claim)
- List View:
Displays vendor claims with details:- Employee Name
- Business Code
- Entity
- Claim No
- Vendor Name
- Invoice No
- Payment Due On
- Approved On
- Total Amount
- Status
- Example entries:
- Claim No: BAJVC-10021 (₹43468, Pending)
- Claim No: BAJVC-10022 (₹3578, Pending)
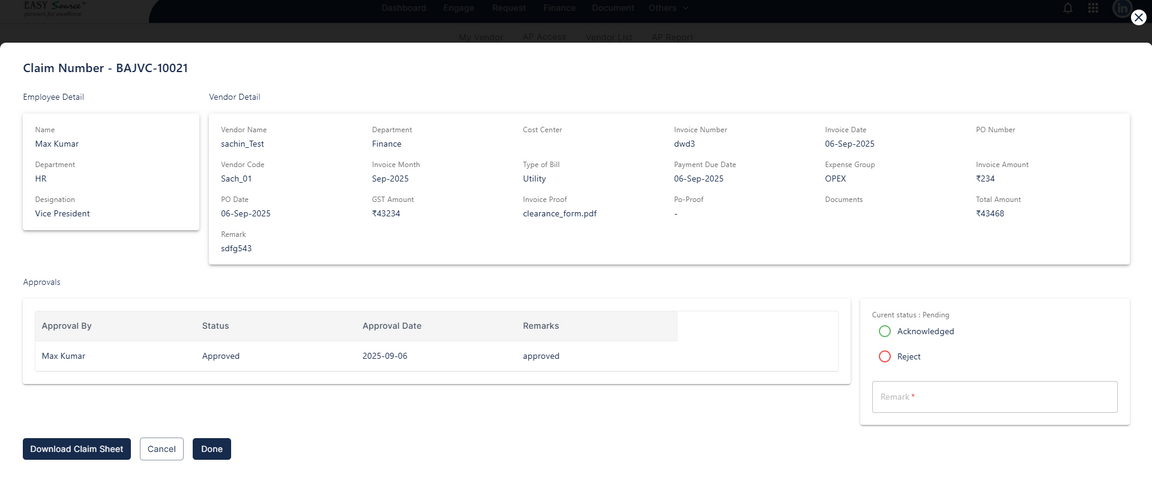
- Action: Open Claim
Clicking on a listed claim opens Claim Details Page, showing:- Employee Detail: Name, Department, Designation
- Vendor Detail: Vendor Name, Code, PO Date, Remark, Department, Invoice Month, GST Amount, Cost Center, Type of Bill, Expense Group, etc.
- Invoices & Proofs: Invoice Proof, PO Proof, Supporting Docs
Amounts: Invoice Amount, GST, Total Amount
- Buttons on Claim Detail Page:
- Download Claim Sheet
- Cancel
- Done
- Approvals Section → Shows approver, approval status, approval date and Add remarks
- Current Status: Pending → Options: Acknowledge / Reject with remarks
Vendor List
- Vendor List Table:
- Name
- Code
- Entity
- Created On
- Status
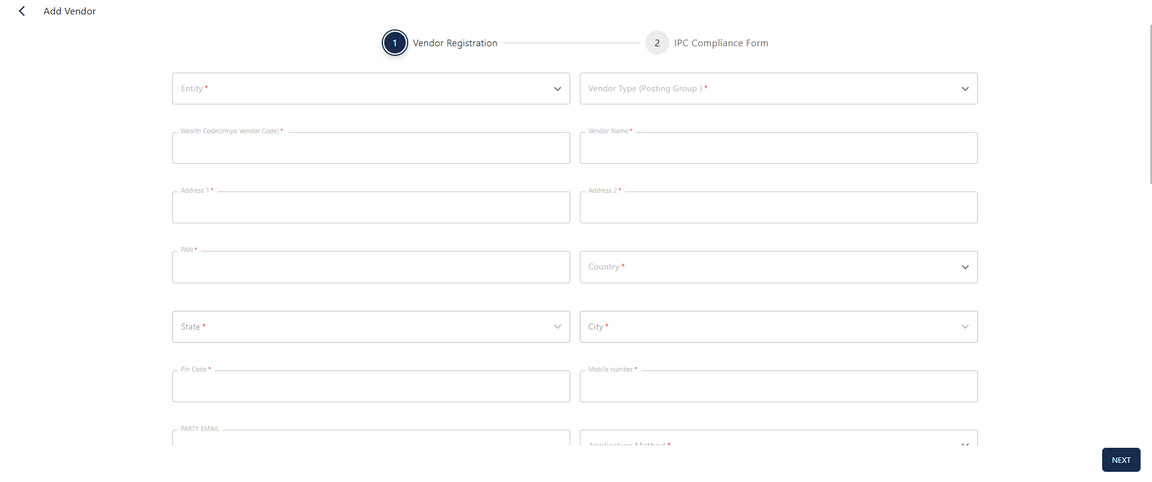
- Action: Add New Vendor
Opens a two-step registration form: - Step 1: Vendor Registration
Fields: Entity, Vendor Type, Zimyo Vendor Code, Vendor Name, Address, PAN, GST Details, MSME Info, Bank Info, Rent Details, etc. - Step 2: IPC Compliance Form
Fields: Status, Location Name, Address, License Details, Trade/Municipal License, Professional Tax Certificate, Business Nature, Agreements, etc. - File Uploads: GST, Rent Agreement, Trade License, PTRC, etc.
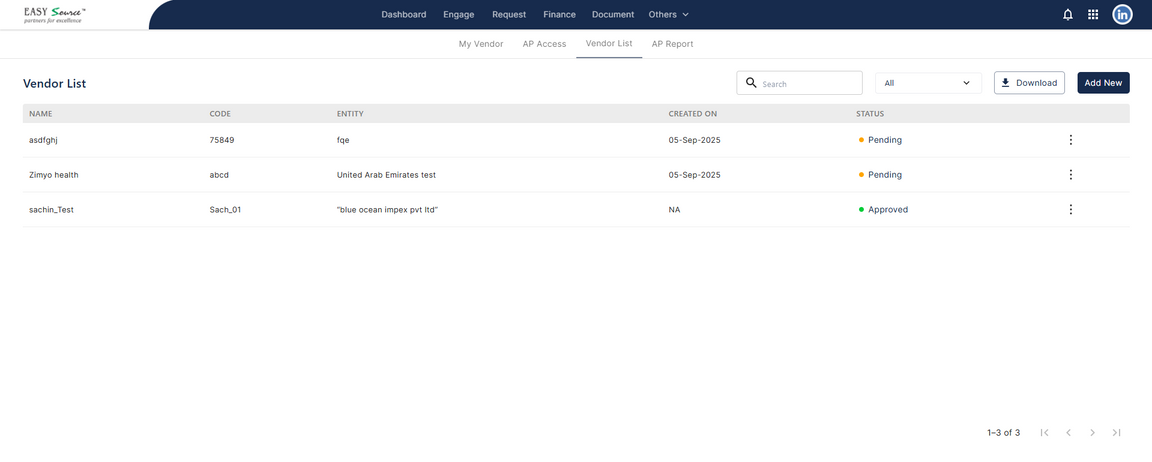
- List Options:
- Download Vendor List
- Add New Vendor
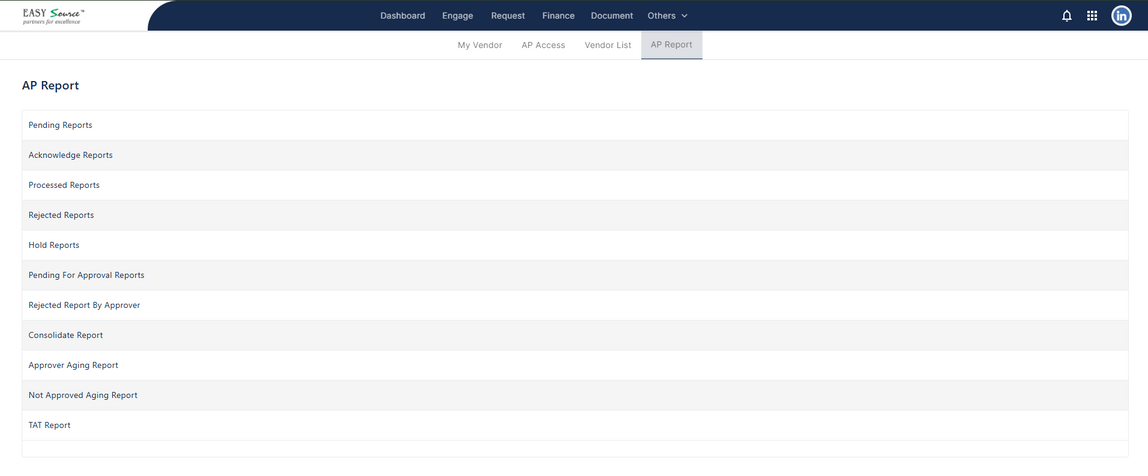
AP Report
This section provides reporting and insights into Accounts Payable (AP) transactions related to vendor expenses.
- Allows downloadand Generate Till Date of AP data in standard formats.
- Summarizes claims by Vendor, Entity, Status, and Expense Type.
- Helps AP teams reconcile invoices, payments, and pending approvals.