Company Information
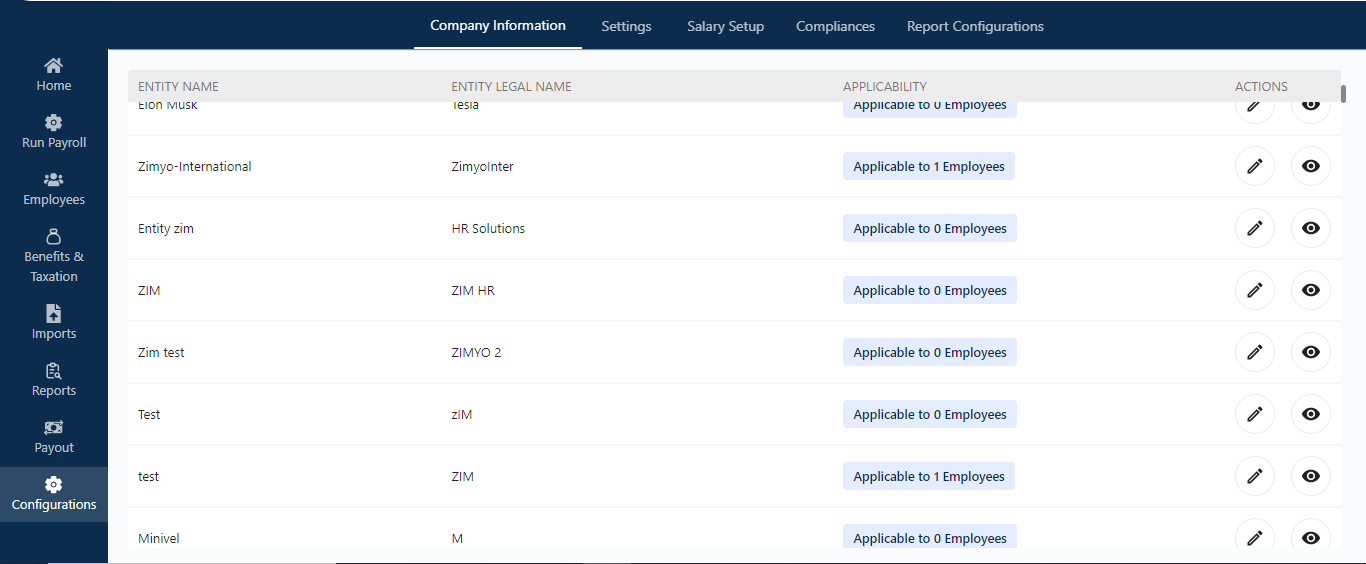
This section displays a list of entities along with their applicability to employees within each entity. The admin can edit company information by clicking the pencil icon and view details by clicking the eye icon.
Edit Button
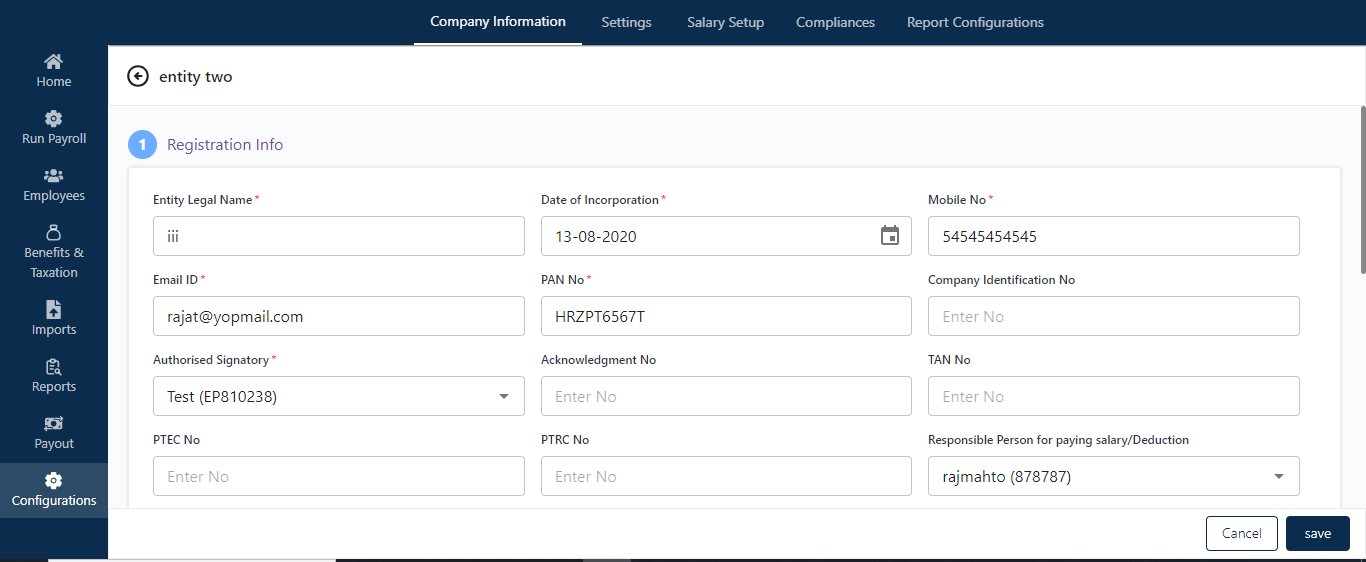
The Edit button allows the admin to modify registration details, bank information, address details, etc. After making the necessary changes, the admin can save them by clicking the “Save” button.
Settings
Entity
Clicking on “Entity” takes the admin to a screen where they can view complete details such as entity name, pay frequency, OT status, applicability, and the action button.
Clicking the action button allows the admin to manage three settings:
- Payroll Settings
- Advance Settings
- F&F Settings

Payroll Settings
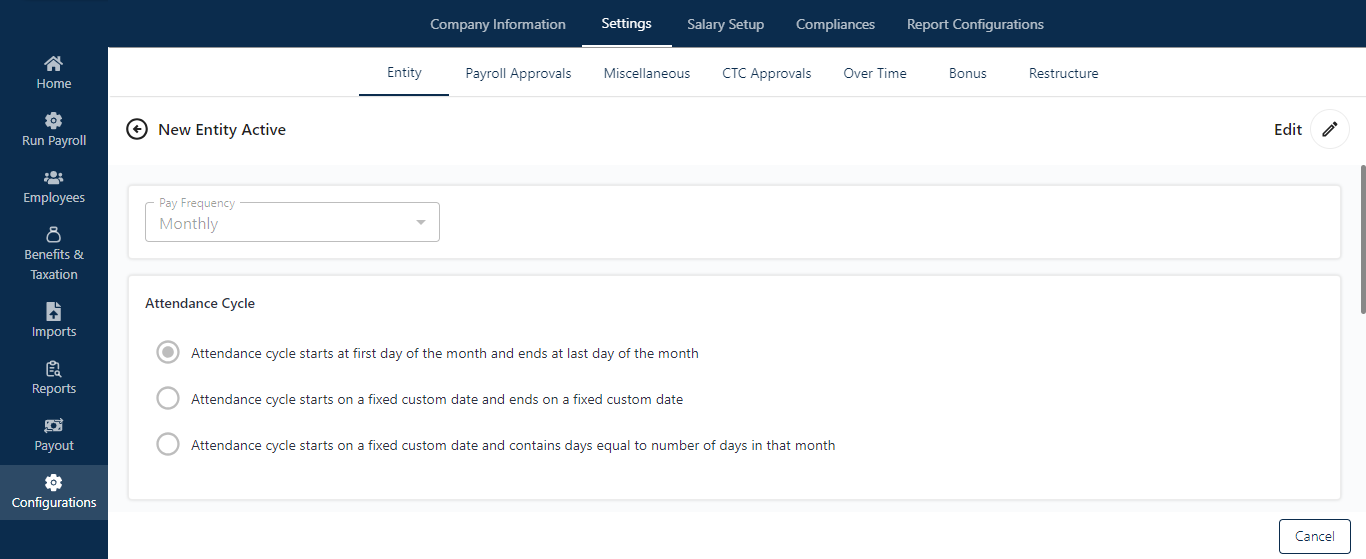
Clicking the edit button allows the admin to make various changes. The admin can set the pay frequency, manage the attendance cycle (customizable from the 1st to the end of the month or any custom range), set pay days in a month, and manage salary calculations (based on CTC or gross). Additionally, the admin can enable overtime, penalize uniform leave, and enable LWF for that particular entity.
Clicking the “Save” button will save all the changes made by the admin..
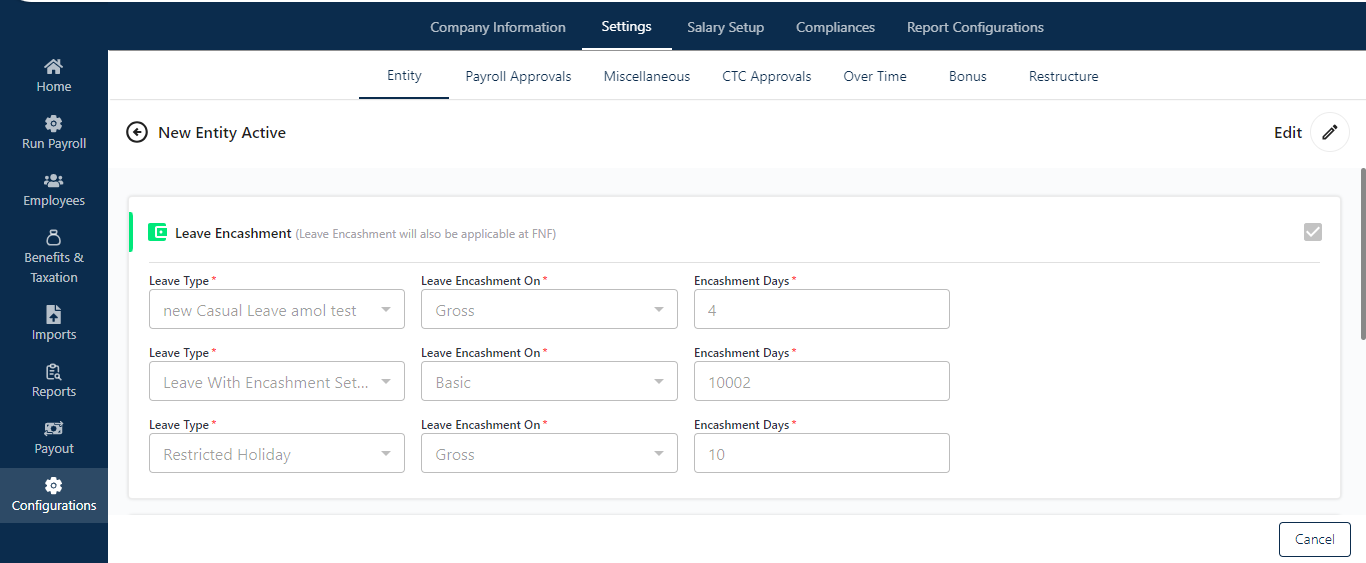
Advance Settings
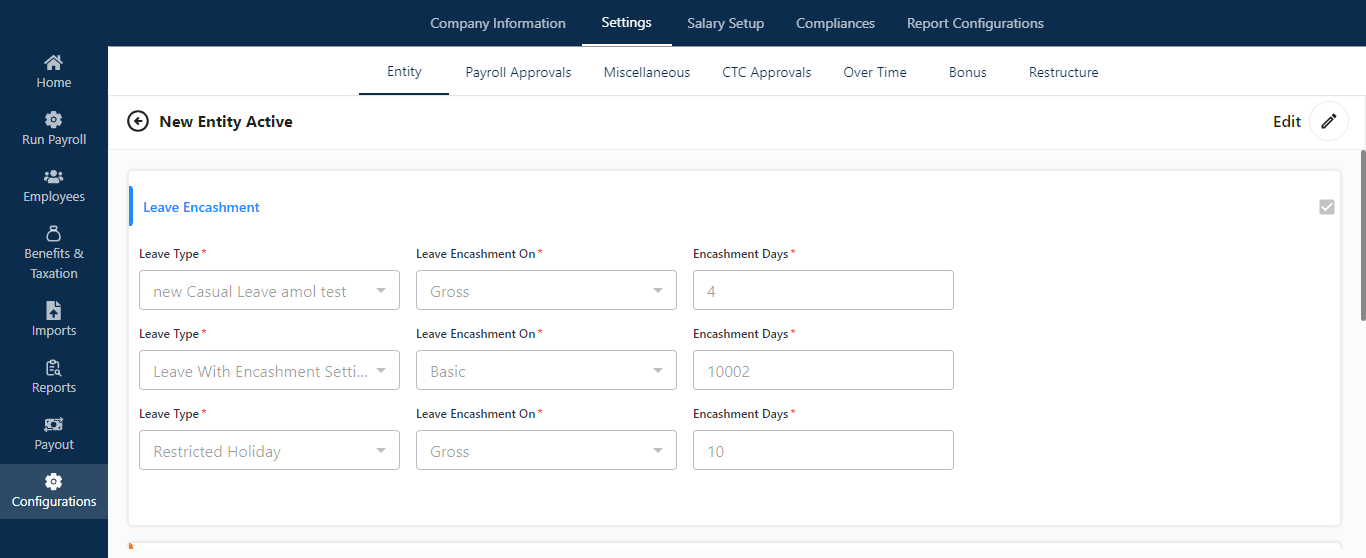
Clicking the Edit button at the top right corner of the screen allows the admin to make various changes under advanced settings. The admin can manually manage leave encashment for that particular entity by selecting the leave type, determining its applicability on CTC or gross, and setting encashment days.
Note: The admin can create multiple leave encashment rules by clicking the add button.
Furthermore, the admin can enable vehicle prerequisites and add payroll assumed days for that particular entity.
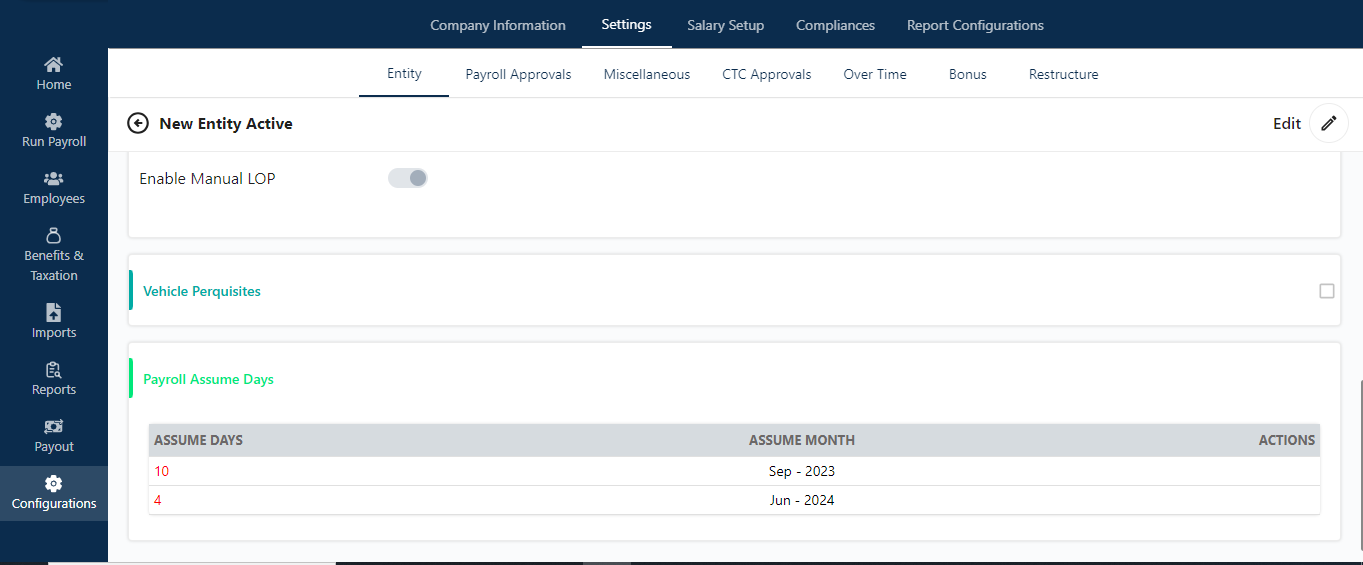
Clicking on “Payroll Assume Days” allows the admin to set payroll assume days, which cannot exceed 10 days for the selected month.
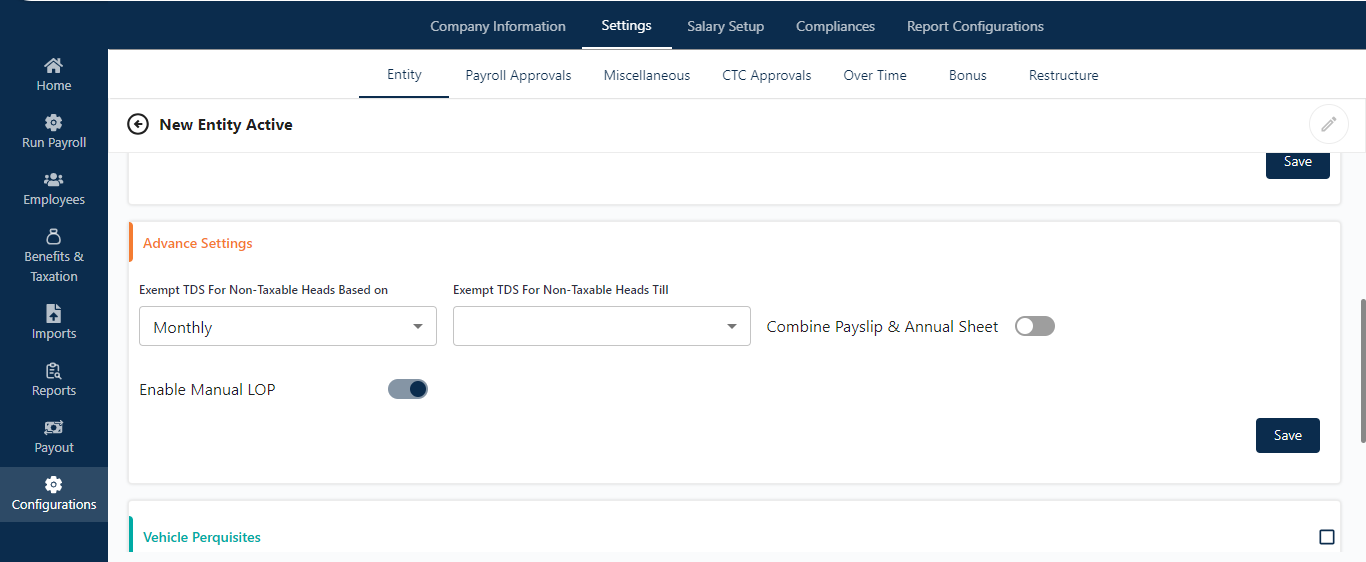
Advance Settings
In this section, the admin can manage TDS exemptions on non-taxable heads, either monthly or based on declarations, and set deadlines in terms of months. The admin can also enable options for a combined payslip and annual sheet, as well as manual LOP (Loss of Pay).
F&F Setttings
In F&F Settings, the admin can create multiple leave encashment rules for F&F by selecting leave types, their applicability, and encashment days. The admin can also enable various settings, including gratuity settlement, notice period penalty, excess leave recovery, and assumed day recovery.
Payroll Approver
In this section, the admin can enable the payroll approver option and define its applicability by department, entity, designation, and location.
Note: If the requester and the approver are the same person, the request will be automatically approved.

Miscellaneous
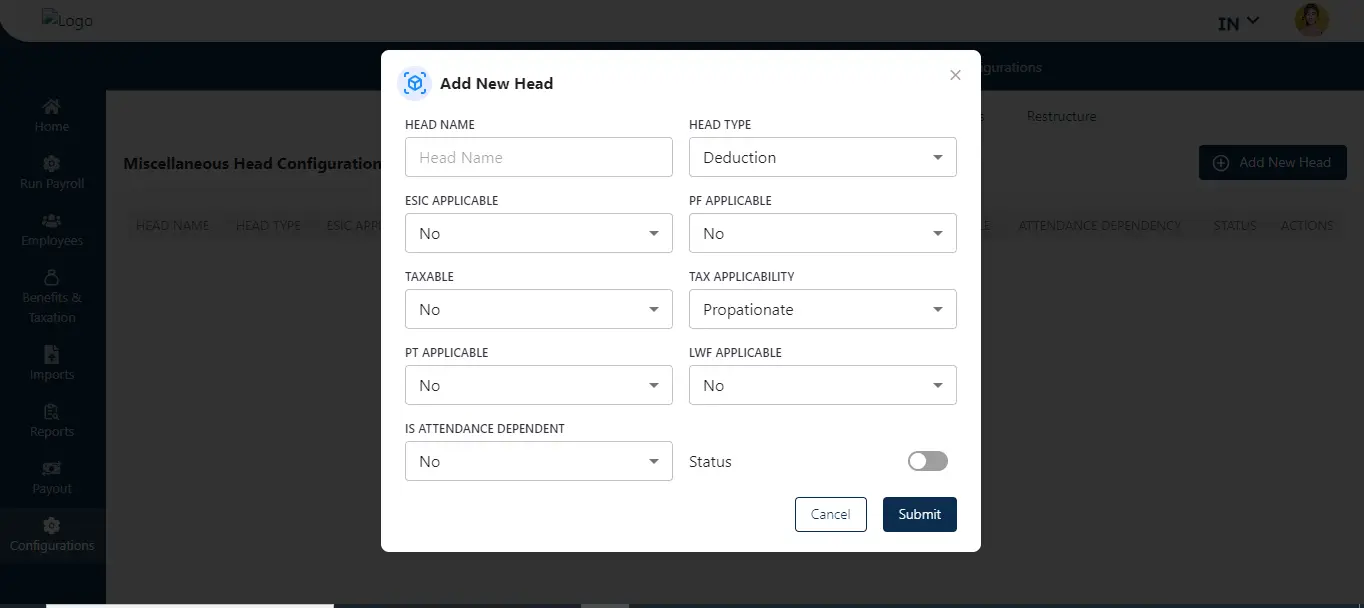
In this section, the admin can create multiple miscellaneous heads by clicking on “Add New Head.”
This will open a popup screen where the admin must fill in all the required fields, such as the head name and head type (earning or deduction).
The admin can also set ESIC and PF applicability, determine if the head is taxable, and set PT, tax, and LWF applicability.
Additionally, the admin can set attendance dependency status and toggle the button to activate or deactivate the head.
Overtime
In this section, the admin can view a list of OT plans currently active within the organization. The admin can see details such as entity name, calculation type, minimum hours, maximum hours, and action buttons.
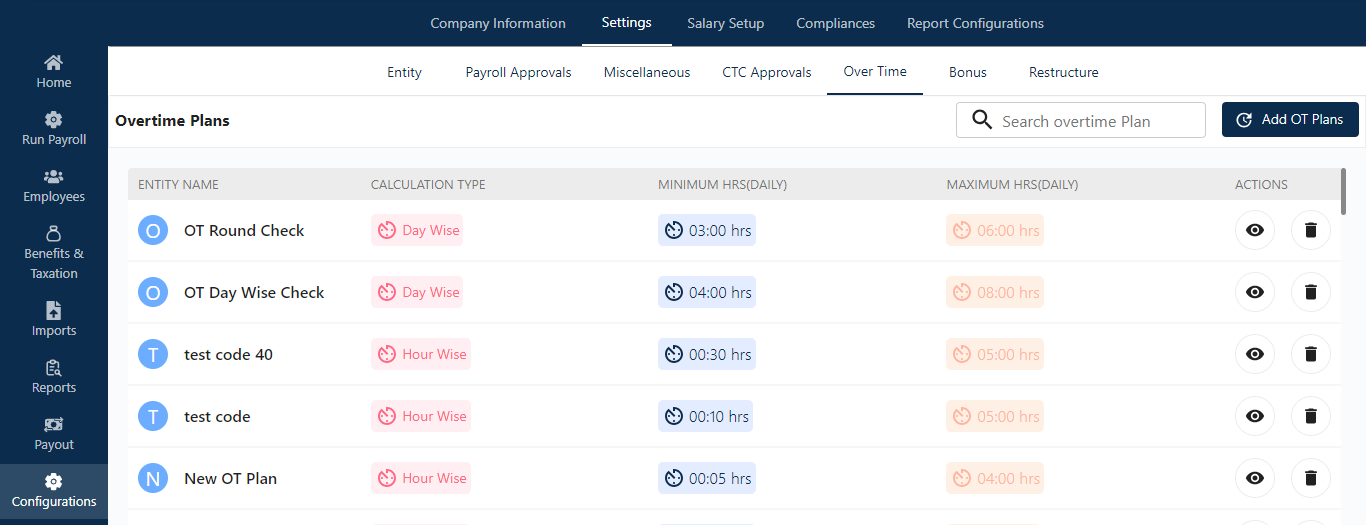
Clicking on the eye icon allows the admin to view the OT plan configurations. Additionally, the admin can delete the plan if necessary.
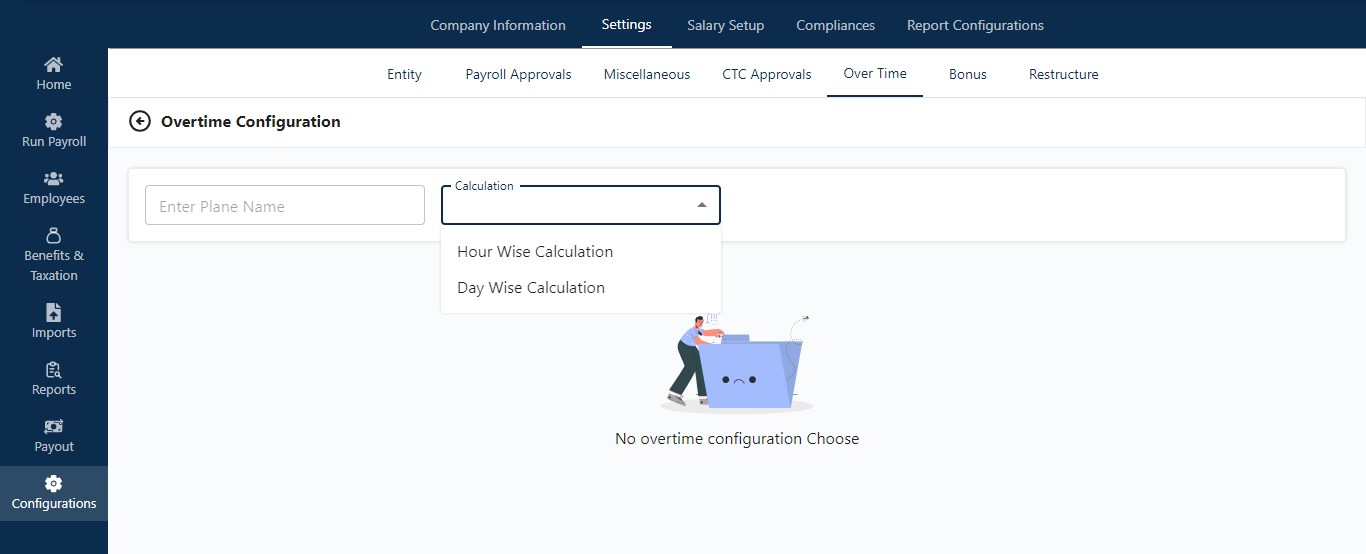
Add OT Plan
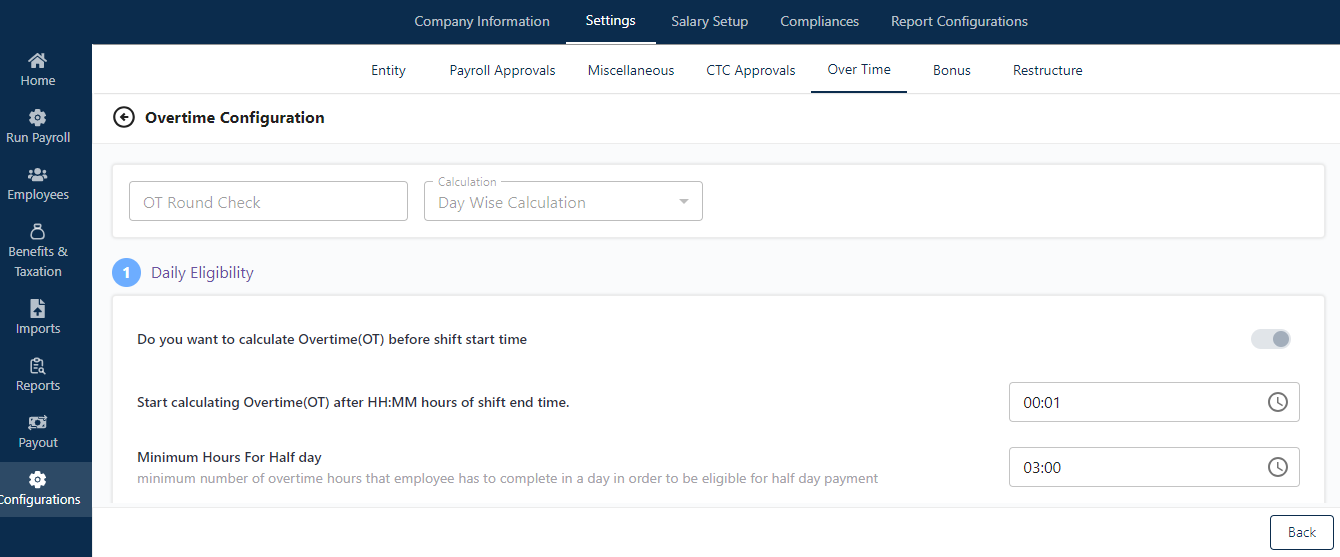
By clicking this button, the admin can set up the OT name and select the OT calculation type, whether it will be hourly or daily. Choosing the calculation type opens configuration options for the admin.
After selecting the calculation type, the admin can set up daily eligibility by defining the minimum and maximum eligible hours for OT. Additionally, the admin can enable the production incentive option and customize it for monthly, daily, or specific time spans.
The admin can also manage OT payments, which can be based on CTC, gross, fixed amounts, or customized as needed.
In OT configurations, the admin can set parameters for weekdays, week-offs, and holidays, specifying overtime and production incentive percentages.
Enabling the round-off function allows the admin to calculate payments in minutes and hours.
Bonus
The admin can manage two sections: Rule Configuration and Head Configuration.
Rule Configuration:
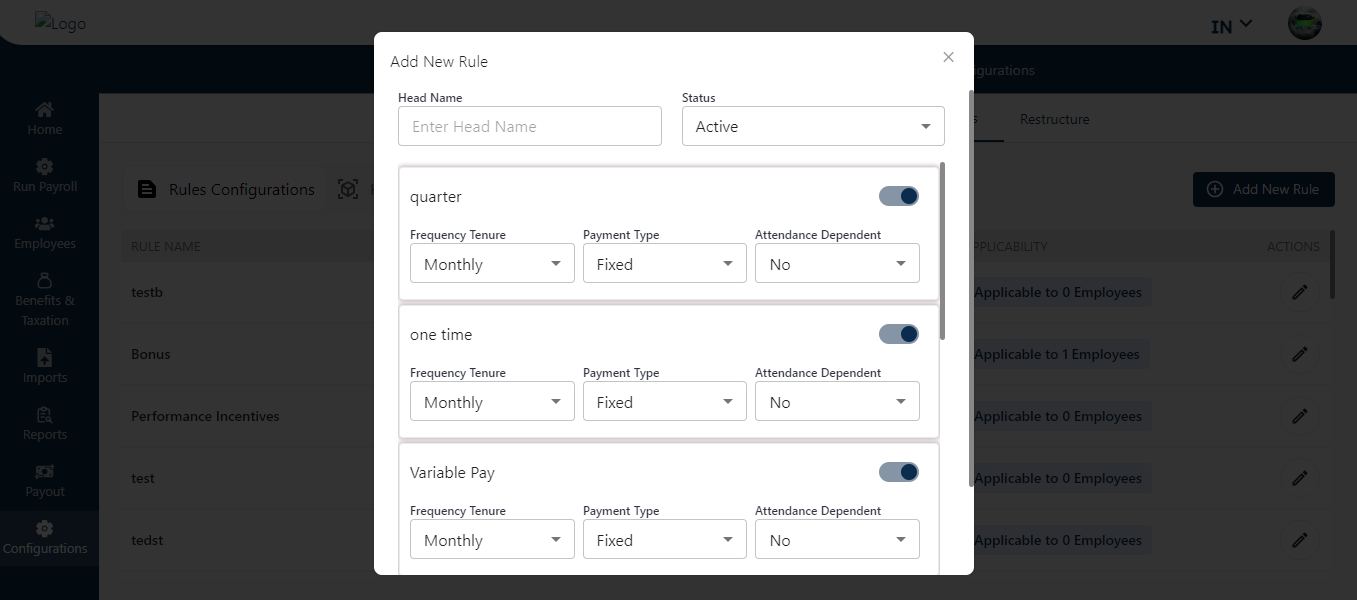
In the Rule Configuration section, the admin can view a list of created rules, displaying the rule name, status, applicability, and actions. Clicking the “Action” button allows the admin to edit existing rules.
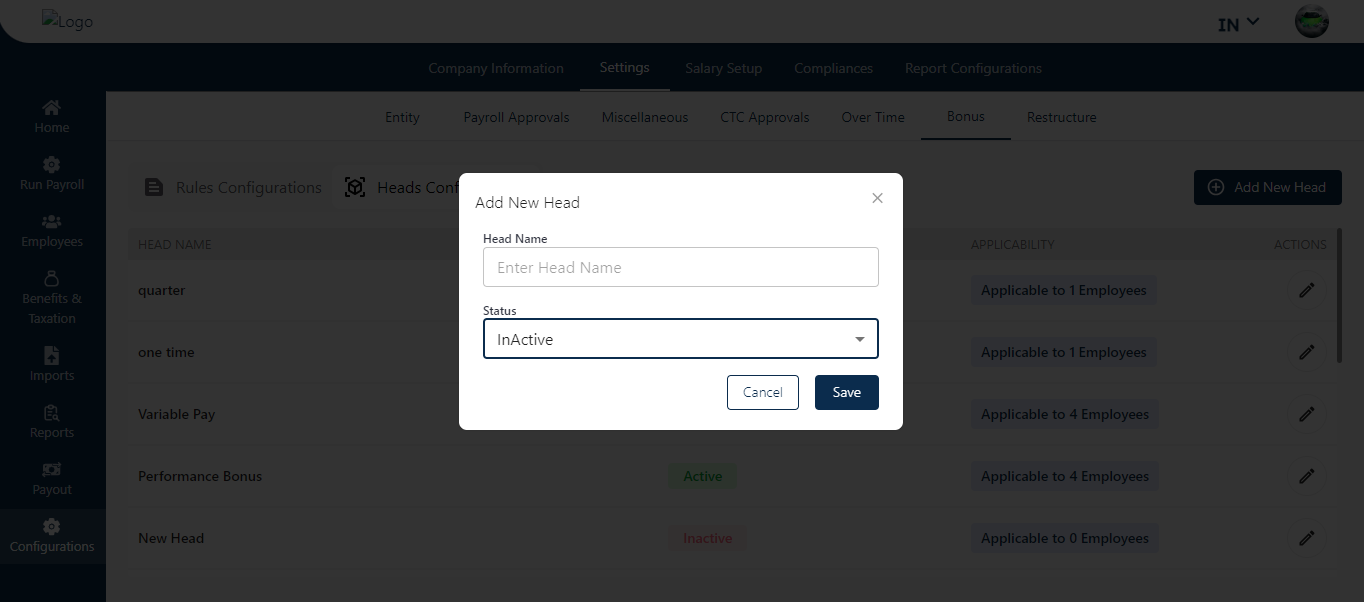
Add New Rules:
Clicking this button enables the admin to create a new bonus rule by filling in the head name and status, setting the tenure, payment type, and attendance dependency.
Head Configuration:
Similar to the Rule Configuration section, the admin follows the same steps in Head Configuration but can create multiple new heads by clicking the “Add New Heads” button.
Salary Setup
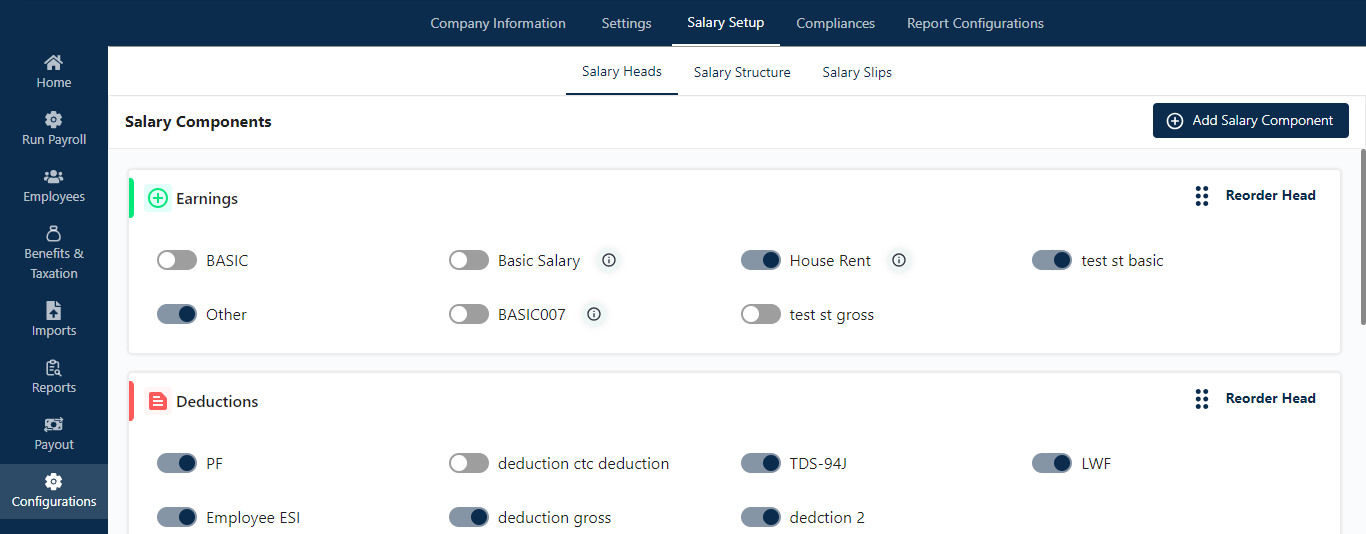
Salary Heads
In this section, the admin can manage salary components such as earnings, deductions, compliance, and allowances. The admin can reorder these components after creating them and can also activate or deactivate them as needed.
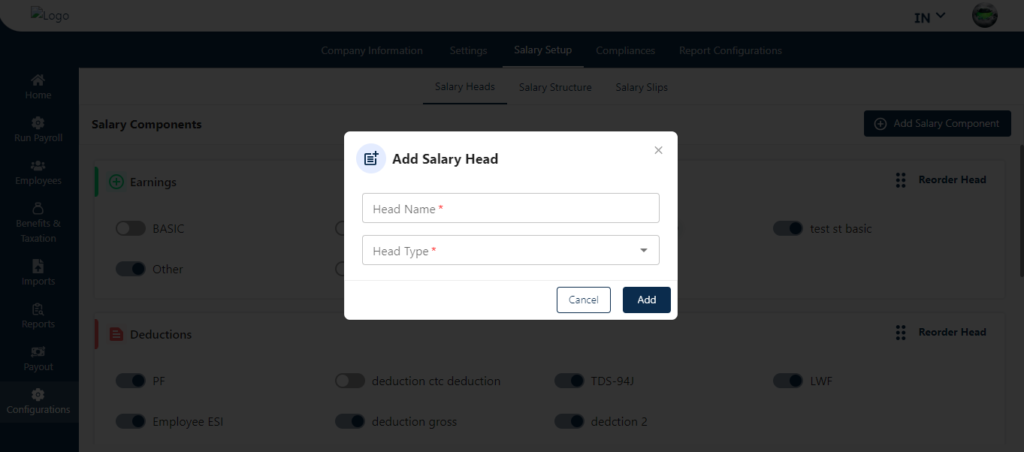
Add salary Component
Clicking on this button takes admin to the popup screen where admin create multiple salary components by giving heads name and select head type.
As shown below in the given screen.
Clicking on this button takes admin to the popup screen where admin create multiple salary components by giving heads name and select head type.
As shown below in the given screen.
Salary Structure
In the Salary Structure section, the admin can manage CTC and Gross calculations.
For CTC Calculation, the screen displays a comprehensive list of salary structures, detailing the structure name, PF rule name, created date, applicability, and actions.
The Action button includes four functions:
- View: Allows the admin to see the created salary structure.
Clone: Recreates the same salary structure with identical configurations.
Edit: Enables the admin to make changes to the existing salary structure.
Delete: Removes the selected salary structure.
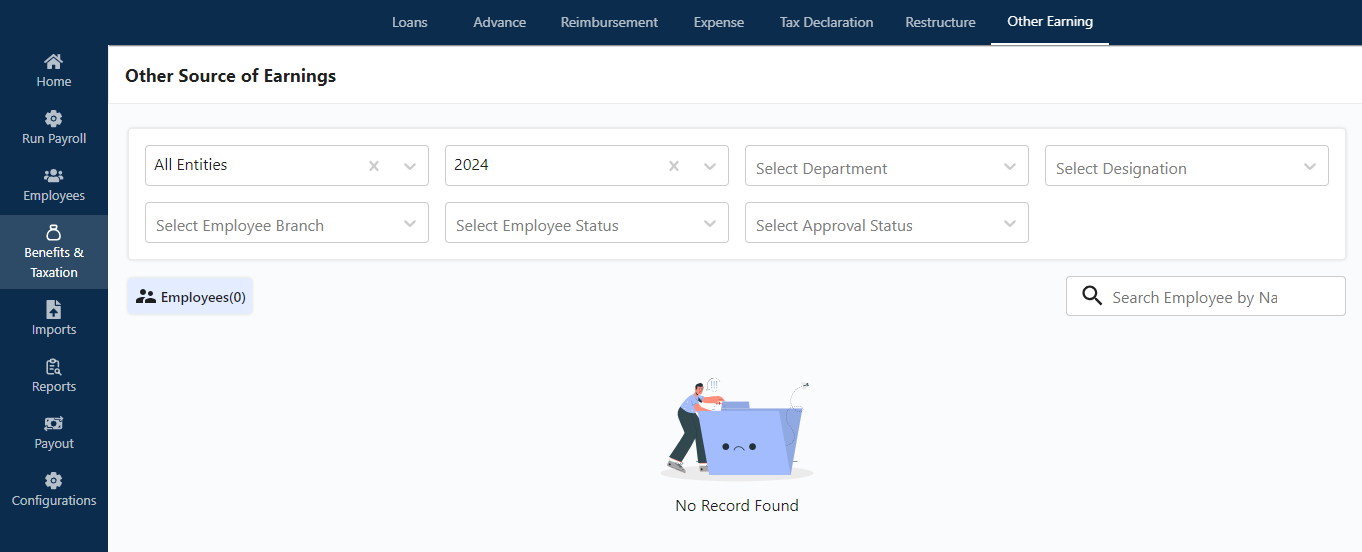
Once saved, the request will be raised and will be visible to the admin under the Benefit and Taxation section.
By applying filters such as Department, Designation, Entity, and Branch, the admin can further refine the search by employee name. Clicking the search button will display a list of employees who have raised requests.