Run Payroll
In the Zimyo Payroll system, administrators can execute payroll through these five sequential steps:
- Manage leave and attendance
- Process arrears
- Review and run payroll
- Initiate payouts
- Publish pay slips
Payroll Navigation
To begin, log in to your Zimyo account and navigate to the payroll section from the All Apps screen.
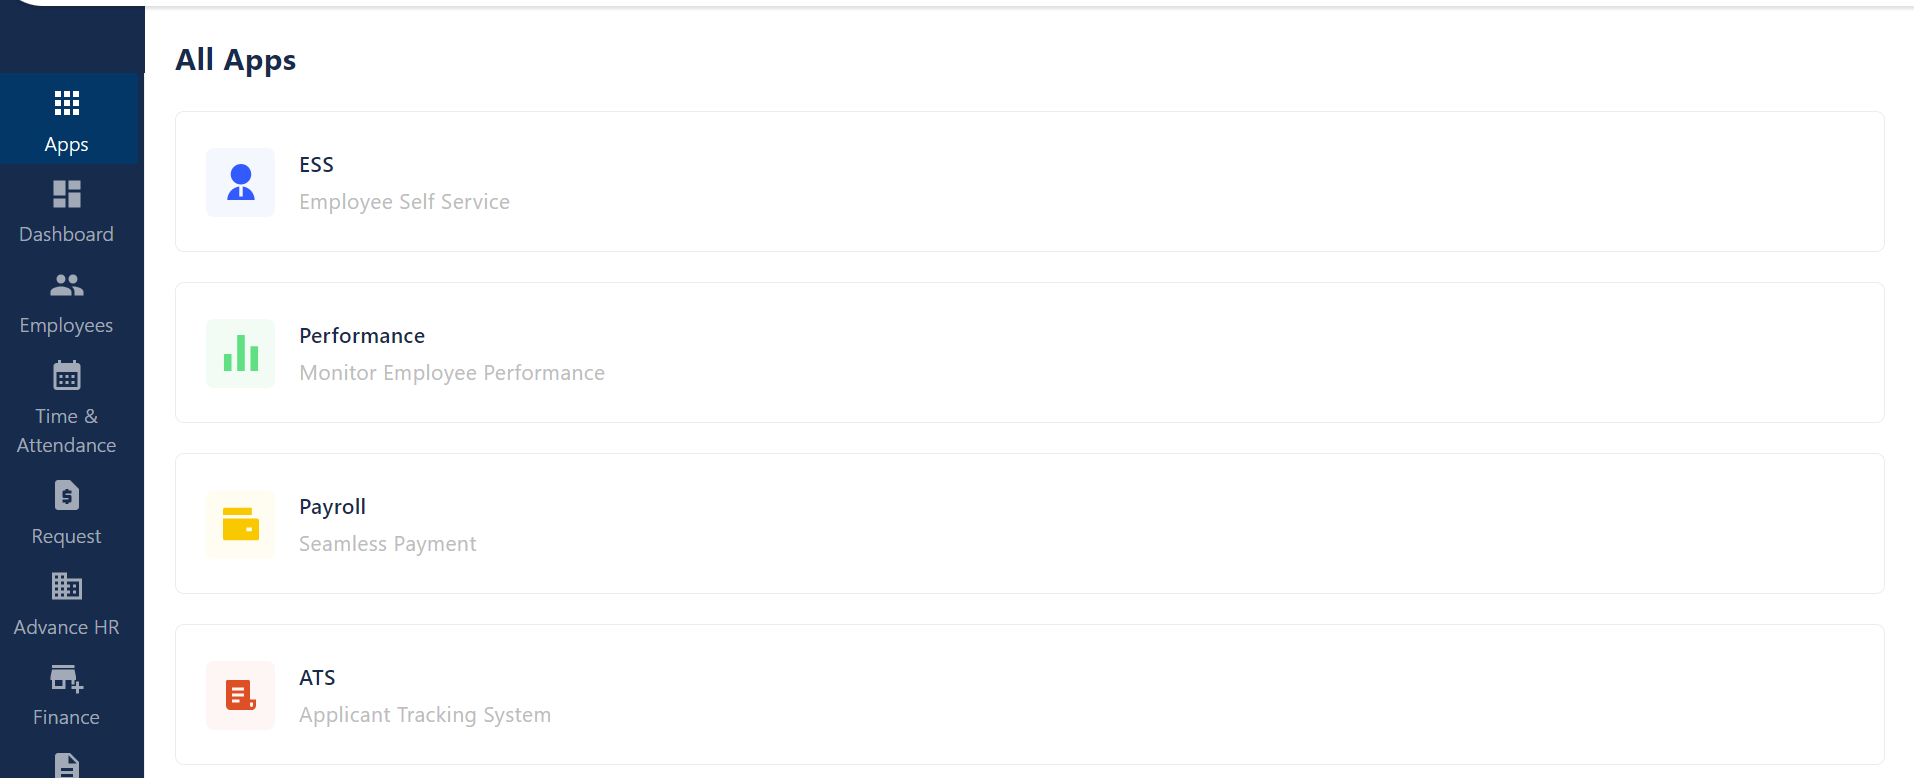
Selecting the payroll option, the admin will be redirected to the payroll home screen.
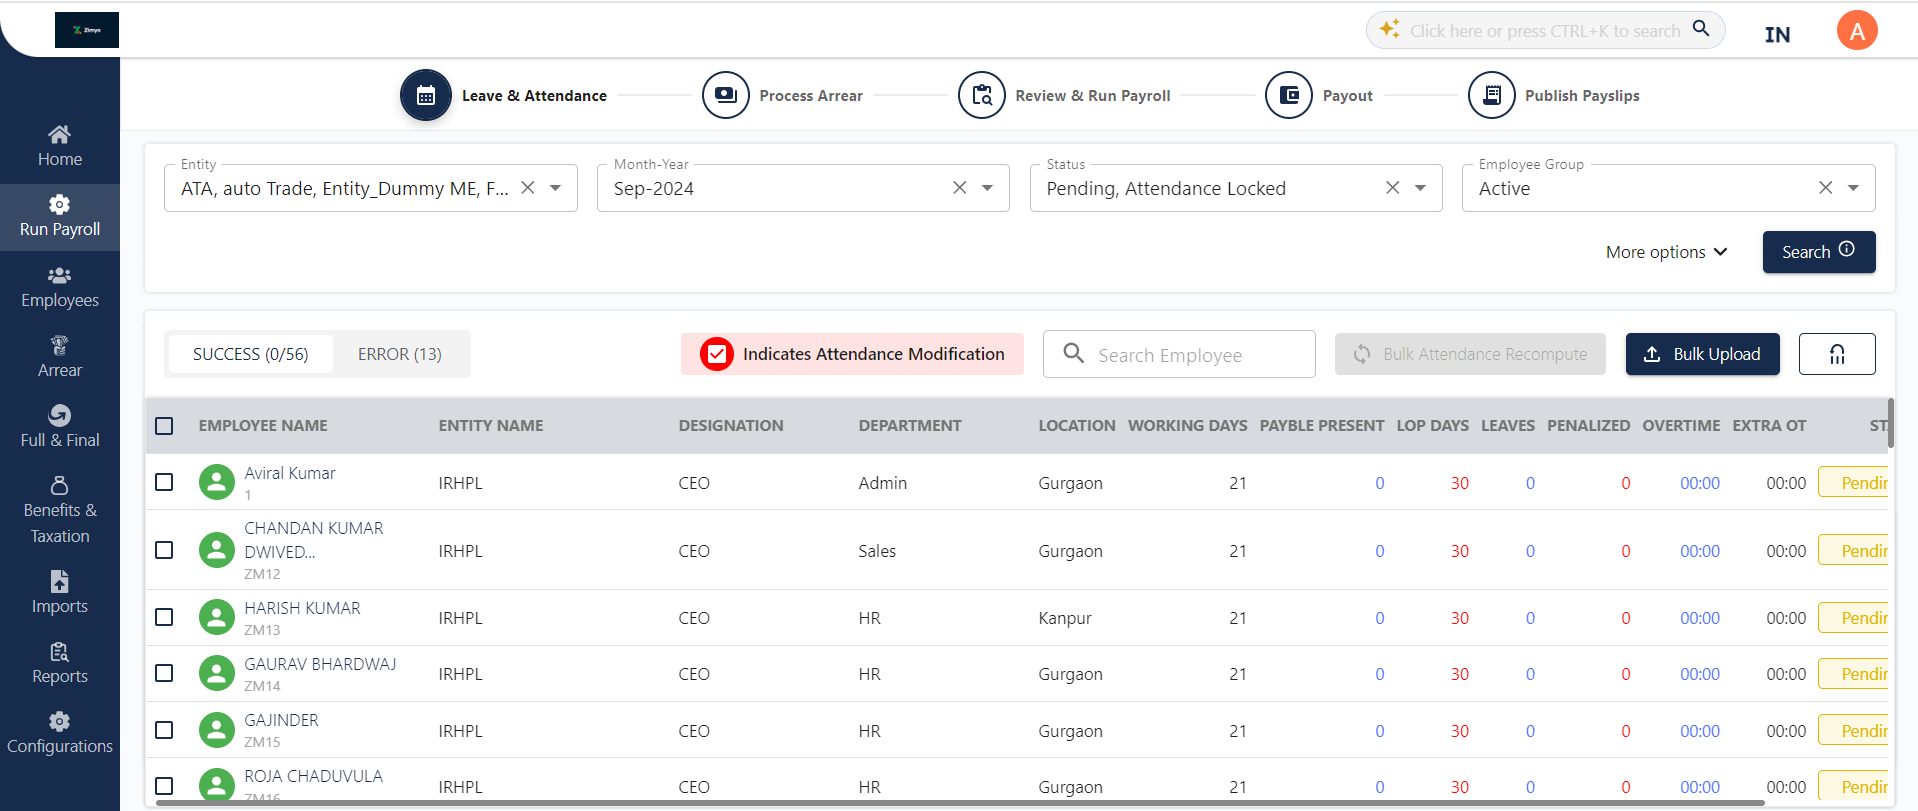
Clicking “Run Payroll” on the left side of the column navigates the admin to the leave and attendance screen.
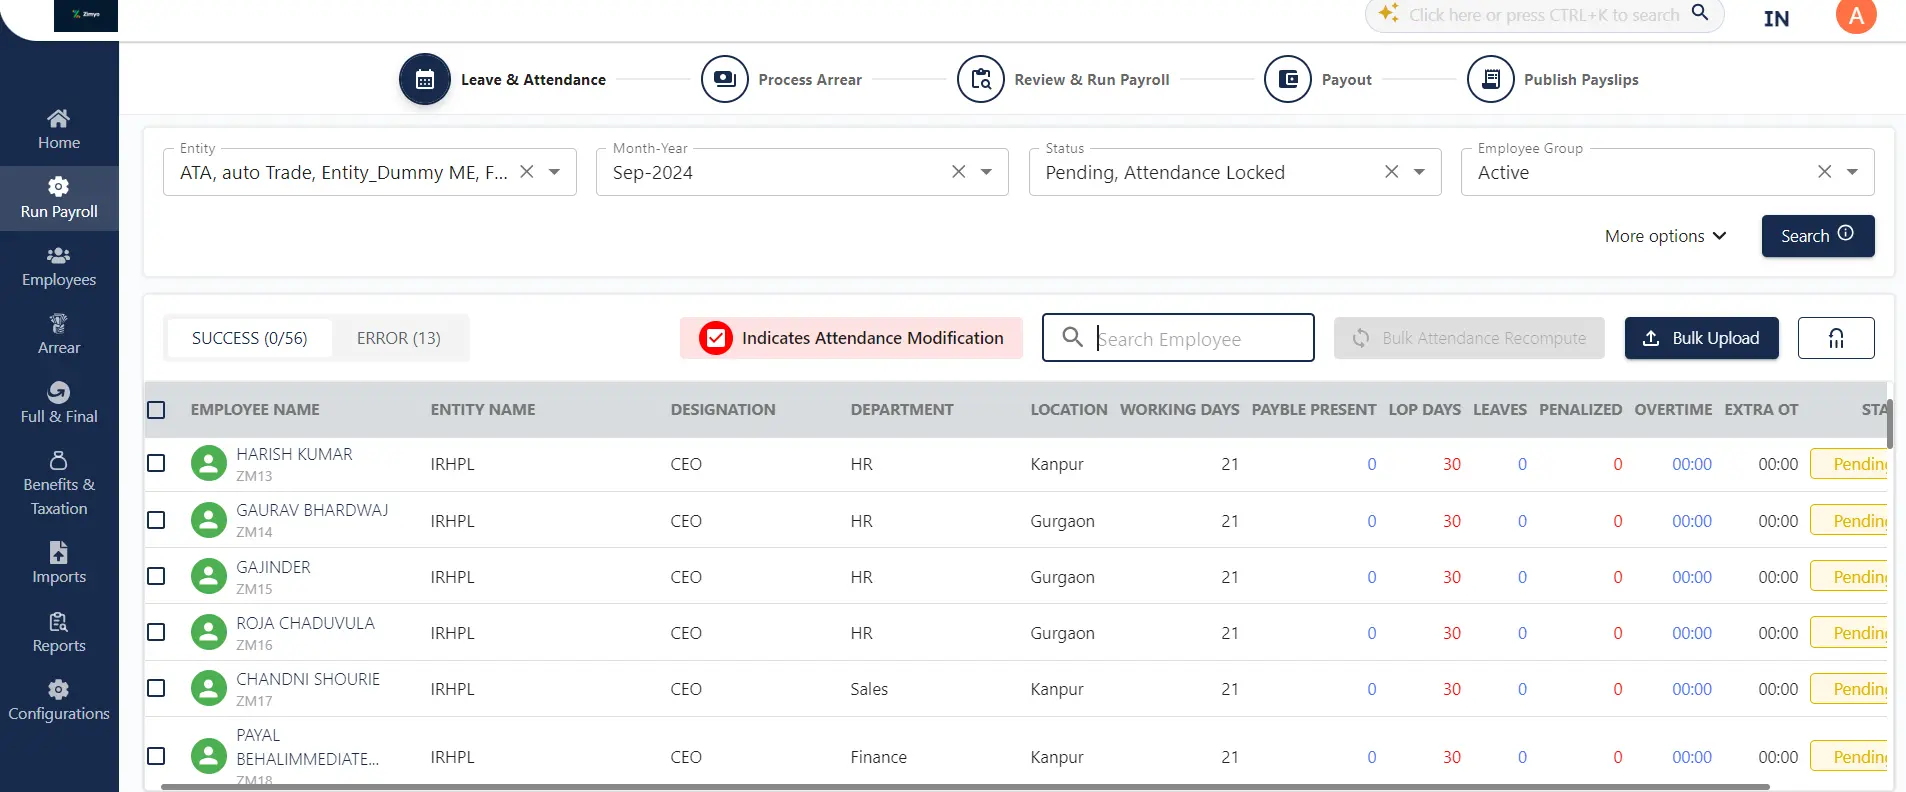
Leave and Attendance
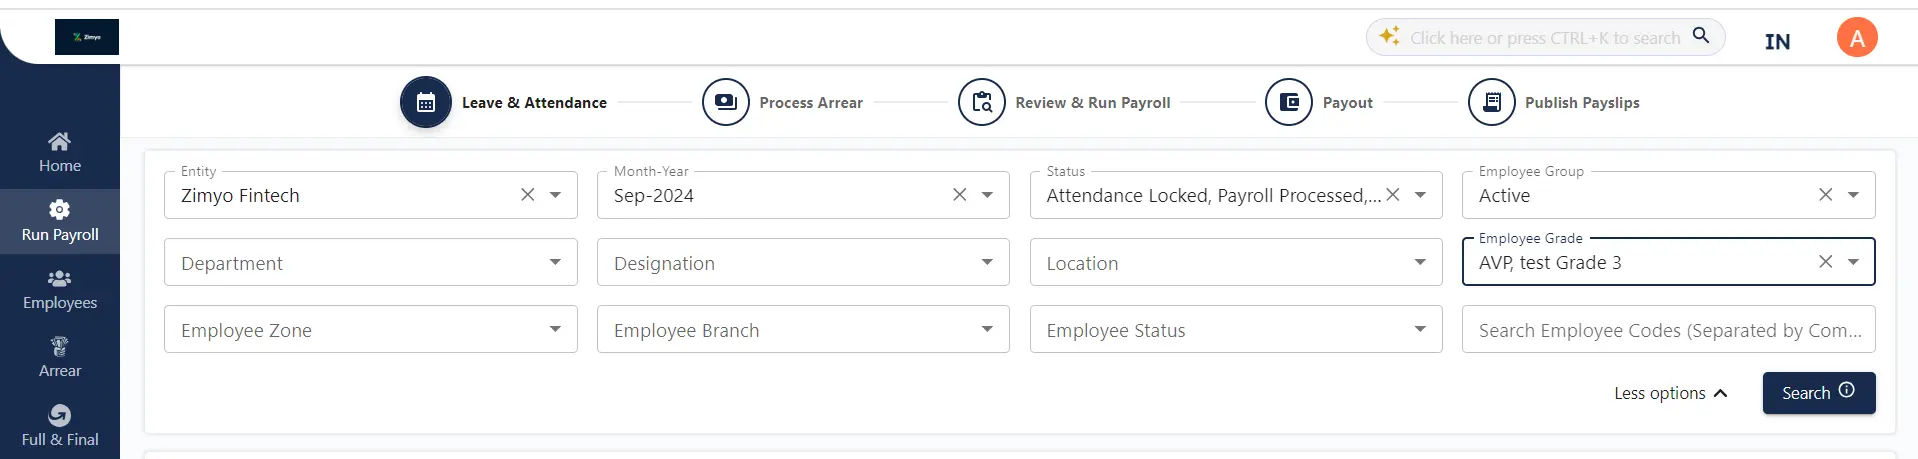
Upon reaching the screen, the admin must choose essential fields to proceed with the payroll process, including entity, month-year, status, and employee group status. Additional dropdown options enable the admin to apply more specific filters like department, designation, employee zone, location, grade, and employee code for a refined selection.
After selecting all the fields, the admin needs to click the “Search” button to access the employee list for the chosen entities and proceed with running the payroll.
Activating the Success tab allows the admin to view employees whose payroll needs processing, and who do not require any additional details to be filled.
The Error tab displays a list of employees whose payroll cannot be processed due to errors, such as missing information like date of birth, date of joining, designation, department, location, gender and CTC.
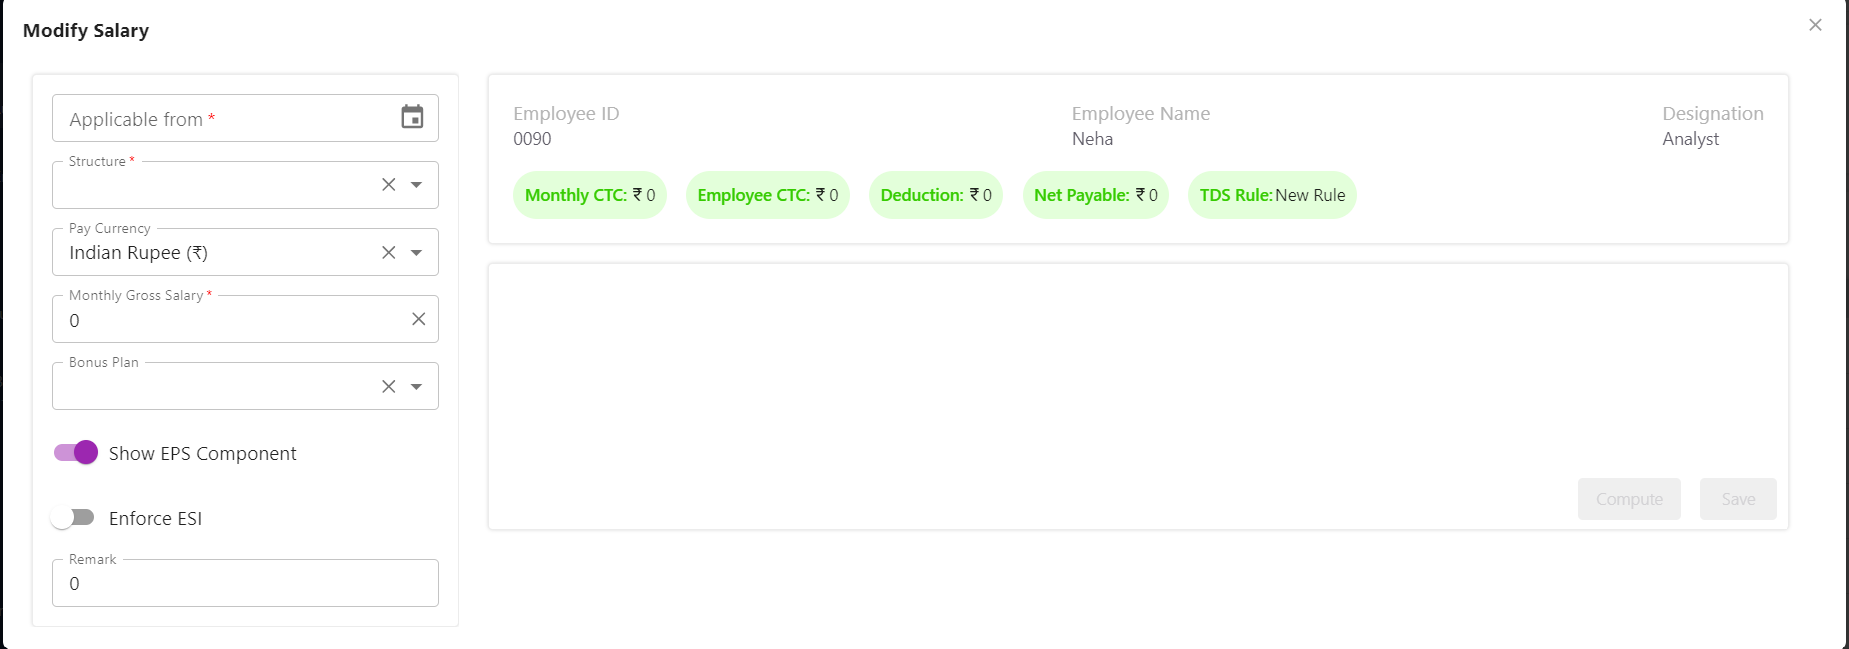
When the admin clicks on the action button located on the right side of the screen, an option to map CTC becomes visible. Opting for this choice allows the admin to adjust the salary by completing all the mandatory fields, performing the computation, and finally, clicking the save button. As shown below on the given screen.
Under the Success employee list, clicking the Action button on the right side of the screen provides the admin with two options: Edit and Recompute.
Edit
Opting for the Edit option opens an additional screen for the admin, facilitating changes in LOP days, overtime, and extra overtime. Changes to overtime and extra overtime are possible only if they are mapped with the employee. Additionally, the admin can manually manage to leave encashment from the same screen.

Recompute
If an administrator makes alterations such as a bulk upload or edits to attendance, the “Recompute” option enables the admin to retrieve and apply these changes on the board. If there are modifications made to the payroll status, and changes have been implemented, the employee will be in a pending status.
NOTE: Once you edit the LOP count. HRMS attendance will be discarded.

Clicking the “Back to menu” button enables the admin to add additional fields to the Employee list based on the organization’s needs. This menu encompasses various fields, including departments, lop days, employee names, codes, and more.
Indicates Attendance Modification

The red-coloured checkbox serves as an indicator of the employee’s status, signifying its role in modifying the employee’s attendance.
In the event that payroll has been processed for any employee and subsequent modifications are made to their attendance records, an indication of these modifications will be provided. The admin can then initiate a recomputation of the attendance data to fetch the most updated information.
By selecting multiple employees from the list, you can activate the bulk attendance recompute status.
Bulk Upload
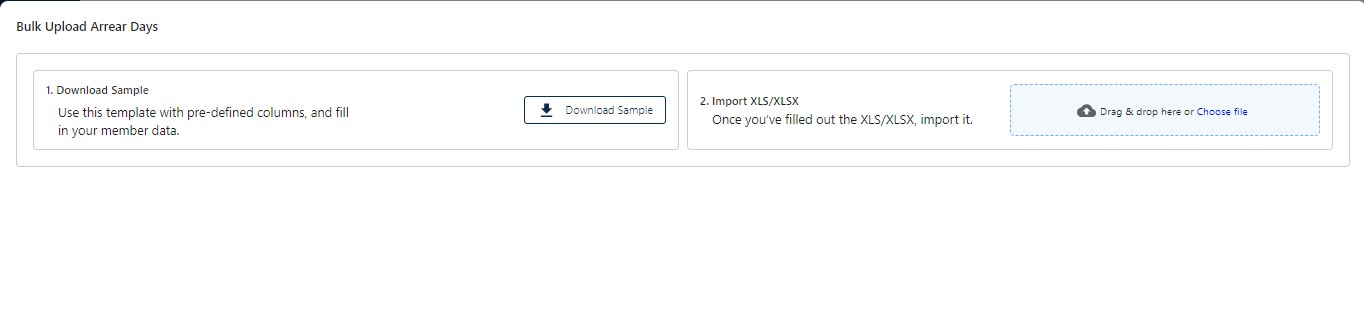
Clicking on the bulk upload feature enables the admin to upload information regarding loss of paydays, overtime, and leave encashments. Choosing any of these options allows the admin to download a predefined template, fill in the necessary details, and then upload the completed template.
Lock Attendance and proceed
By clicking on “Lock attendance and proceed,” the admin moves to the next step in running the payroll.
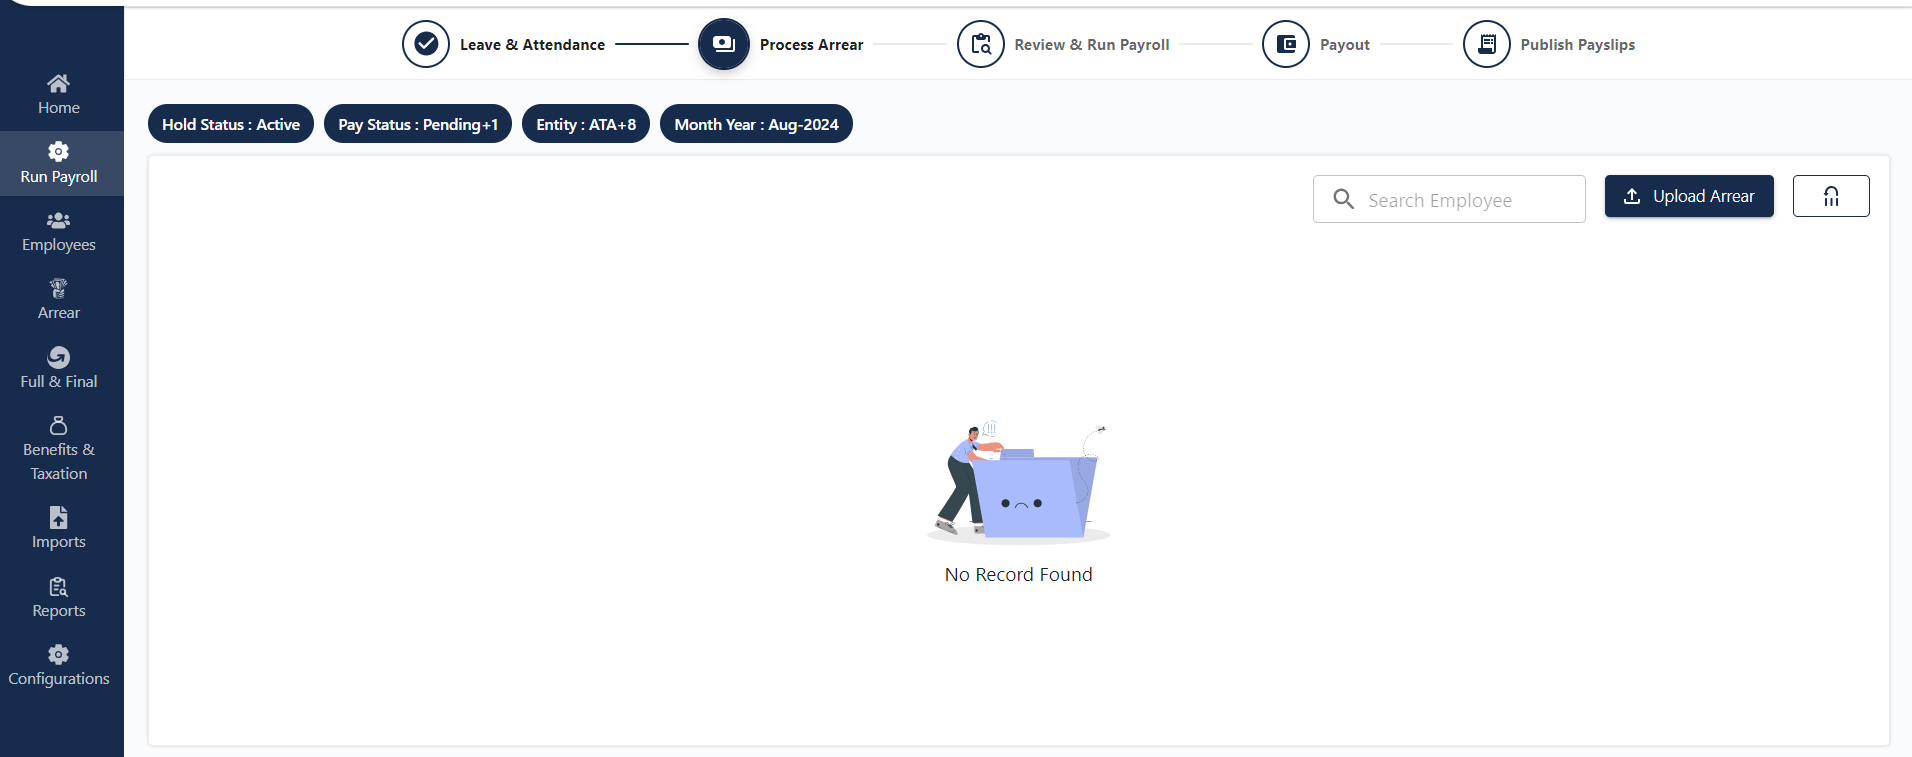
Process Arrear
When the admin selects the employee list and clicks on the “Lock Attendance and Proceed” button, it permits them to advance to the Arrear Processing stage. This section displays the list of employees who are pending for arrear processing.
Clicking on the checkbox and selecting employees empowers the admin to activate the “Next” button. Clicking the next button grants the admin the ability to process the arrear, or they can exercise the authority to skip the entire process if they are not willing to pay the arrear.
Upload Arrear
Clicking on the arrear month provides a monthly view of the arrear breakdown for each employee during the months. Selecting the view option further reveals the detailed arrear breakdown for that particular month.
Review and Run Payroll
In the payroll processing sequence, “Review and Run Payroll” stands as the third crucial step. During this phase, administrators can recalculate payroll, implement modifications, and scrutinize the detailed breakdown of salaries.
Action Button
Upon clicking the “Action” button, the administrator is presented with four options. These options empower the admin to undertake various actions, including viewing detailed salary information, editing deductions, revising salaries, and recomputing them as needed.
The success tab determines the Employee list who are successfully reached at the third step and qualified for the payroll processing. Here the admin can take a few more actions
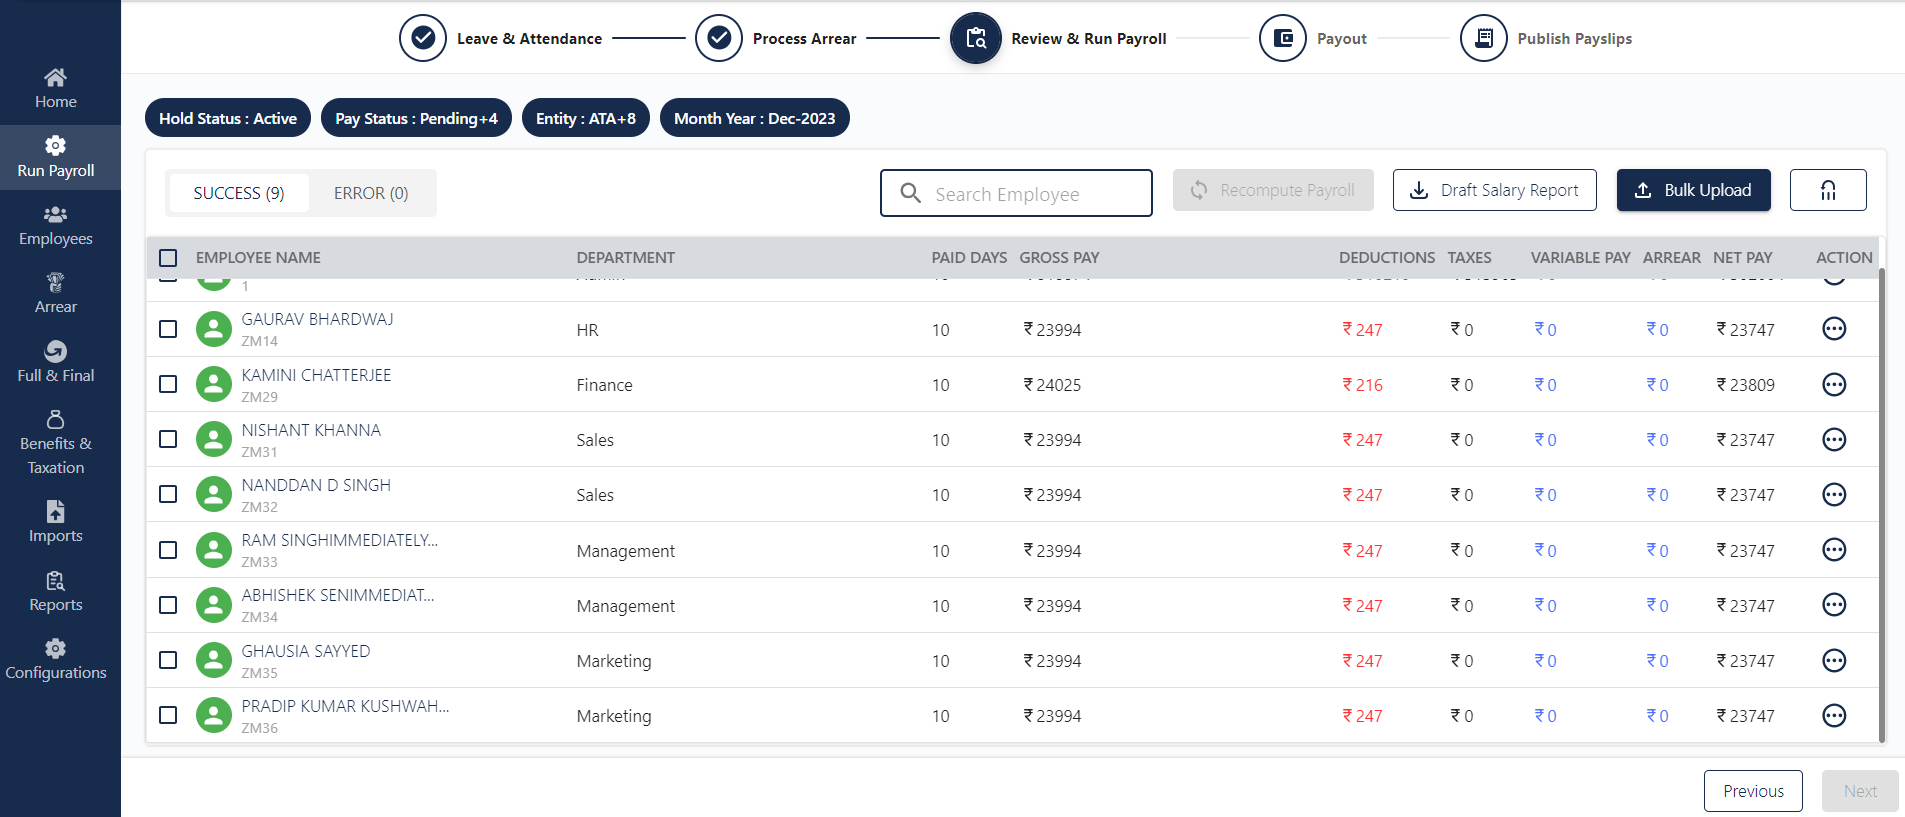
When an admin chooses an employee from the employee list, they can bulk recompute the payroll. Subsequently, clicking on the “Save” button seamlessly takes the admin to the next step in the process.
Bulk Upload
Upon clicking the bulk upload feature, three distinct options unfold for the admin: overriding TDS, managing miscellaneous entries for deduction and earnings, and handling bonus uploads in bulk

Override Income Tax
By choosing to override income tax, the admin gains the ability to manually adjust and modify entries for Tax Deducted at Source as per their requirements.
Miscellaneous
The bulk upload functionality facilitates the streamlined addition of miscellaneous earnings and deductions. Utilizing this feature entails downloading the predefined template, completing the requisite details, and then importing it.
Miscellaneous earnings encompass additional income, like returns on small investments made by employees, integrated into the payroll.
On the other hand, miscellaneous deductions involve subtracting amounts from the salary during payroll processing, covering various scenarios such as loss of employee assets.
Bonus
During a specific month, organizations offering bonuses to employees can easily manage the process by incorporating the bonuses into their salaries during payroll execution. The administrative task involves downloading the predefined template, populating it with essential details, and then importing it in the same CSV format.
Draft Salary Report
Clicking on the draft salary button allows the admin to download the salary report of selected employees in bulk.
Recompute Payroll
By choosing employees displayed on the screen, the admin can efficiently recalculate their payroll in bulk. This streamlined process simplifies the task of managing and adjusting the compensation for multiple employees simultaneously.
Simply click on the “Next” button, The admin is seamlessly moved into the subsequent step to proceed with running the payroll.
The error tab displays a list of employees ineligible to progress to the subsequent “Payout” step. The remark section within the error tab elucidates the specific reasons why these employees have been categorized as errors. As shown below in the screen.

Payroll Approval
Sub-admins efficiently manage payroll for approval, ensuring accuracy, while approvers review and validate draft salary sheets for a precise and streamlined process.
How it works
- To initiate the payroll approval process, configure the approval hierarchy, granting the ability to approve or reject requests. You can include both Approver Level 1 and Level 2 during configuration.
- With the settings in place, Sub Admins can initiate payroll processing by selecting ‘Run Payroll’ and, in the third step, ‘Review and Run Payroll,‘ they can submit requests for approval.
- Once submitted, requests will promptly appear on the Approver’s Dashboard. Approvers receive email notifications for timely attention and can review and take action by approving or rejecting requests.
- Approved requests are marked as ‘Approved,’ allowing Sub Admins to proceed with subsequent steps, including payout processing and employee pay slip publication.
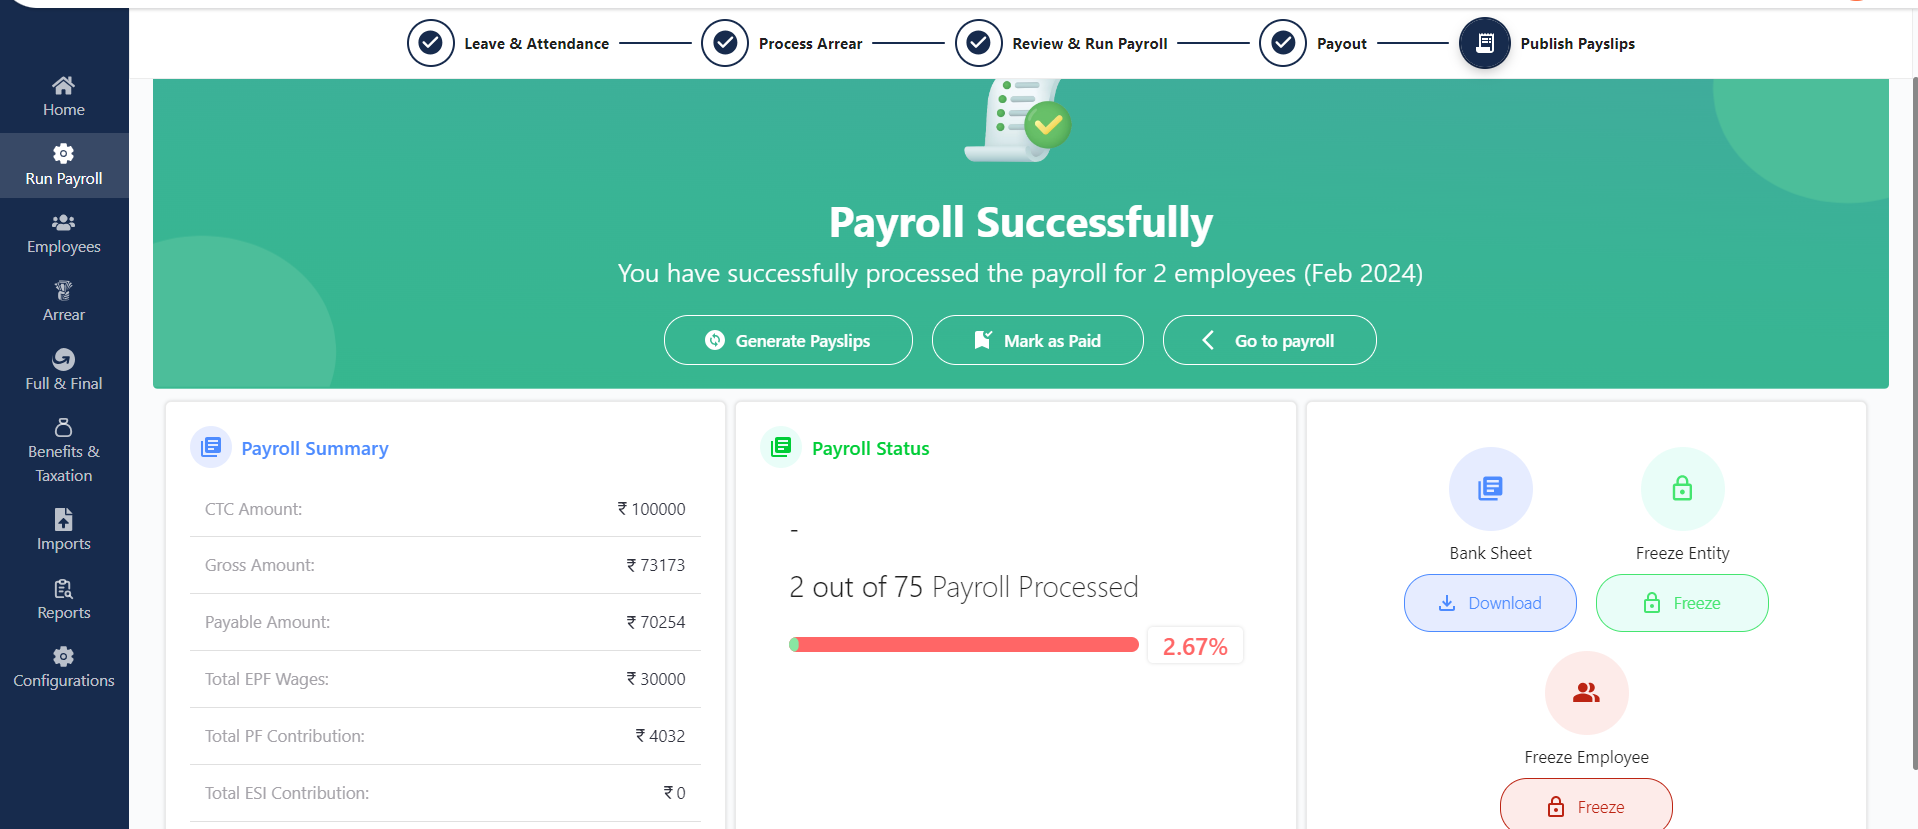
Publish Salary Slip
The final step in the review and run payroll process is “Publish the Salary Slip.” In this setting, the admin can effortlessly publish salary payslips with a single click, gaining a comprehensive view of the payroll summary and its current status.
This feature empowers the admin to print the payslip in a format configured by the admin through the backend, ensuring a customized and streamlined output.
Mark as Paid
Submitting Mark as Paid will update the payroll status for processed employees to ‘Paid’ in the system
Download Banksheet
This functionality enables an admin to download employee payroll processing data as an Excel sheet, facilitating seamless submission to the bank for the subsequent step.
Freeze Entity
By clicking the button, the admin can freeze the payroll process for the entire entity. After freezing, the admin loses visibility of that specific entity throughout the entire payroll running process for that particular month, hindering further processing.
Freeze Employee
As an entity, the admin has the option to exempt specific employees, ensuring their non-participation in the payroll process for a particular month.