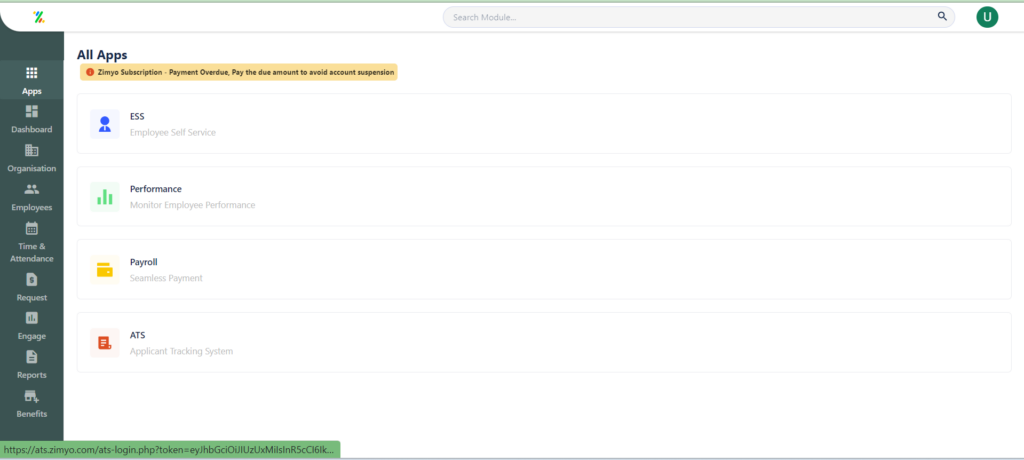
If an RM doesn’t respond to a request it will be automatically moved to another person who is assigned to approve the request. You can set this kind of workflow by adding another level to the “Pending” tab. To do so first log into your Zimyo account.
This will take you to the Admin dashboard.
2. From the Admin dashboard click on “Organisation”. This will land you on the Organisation dashboard where all configurations related to company level can be done. From the dashboard click on “Workflows”
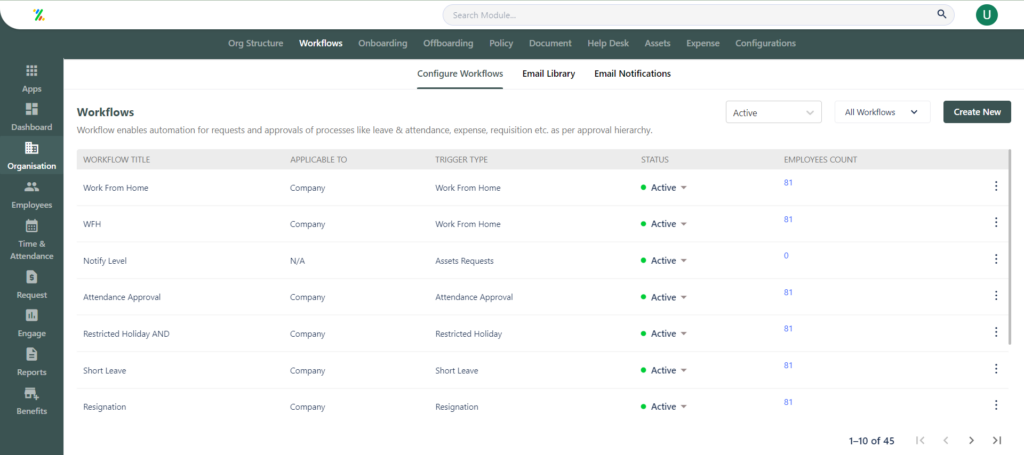
3. As we land on Workflow, click on Create new to create the Workflow.
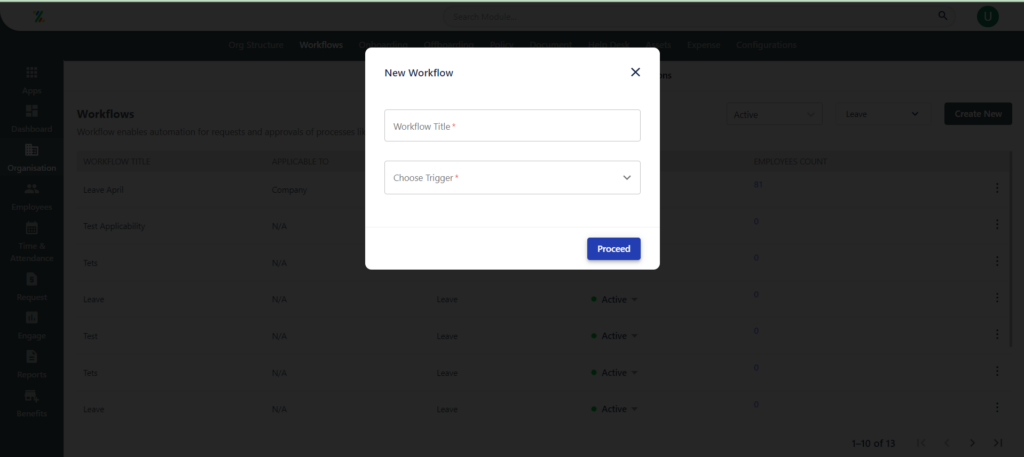
4. As soon you click on “Create New”, there will be two options, “Workflow title” and “Choose trigger”. Fill the same accordingly
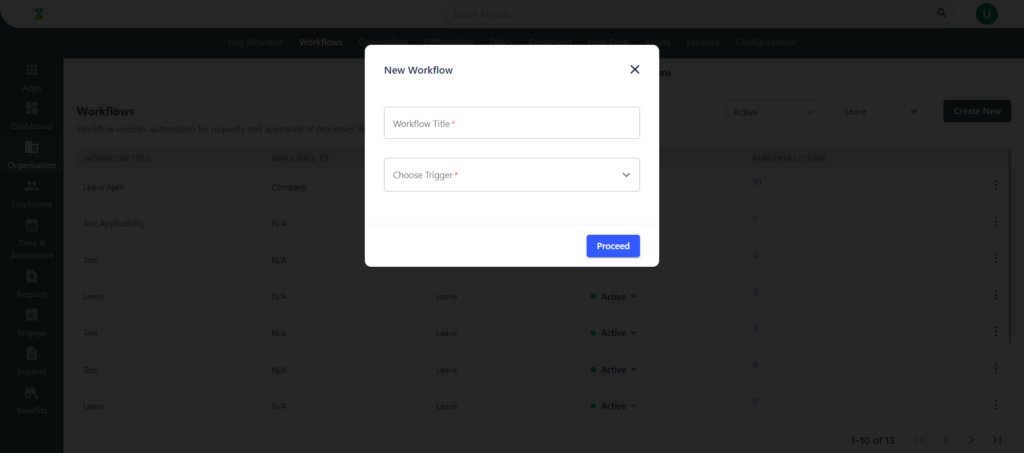
5. After filling the Title and the Trigger, click on “Proceed” to continue which will take you to the workflow configuration page where we will add multi level approver and set the condition
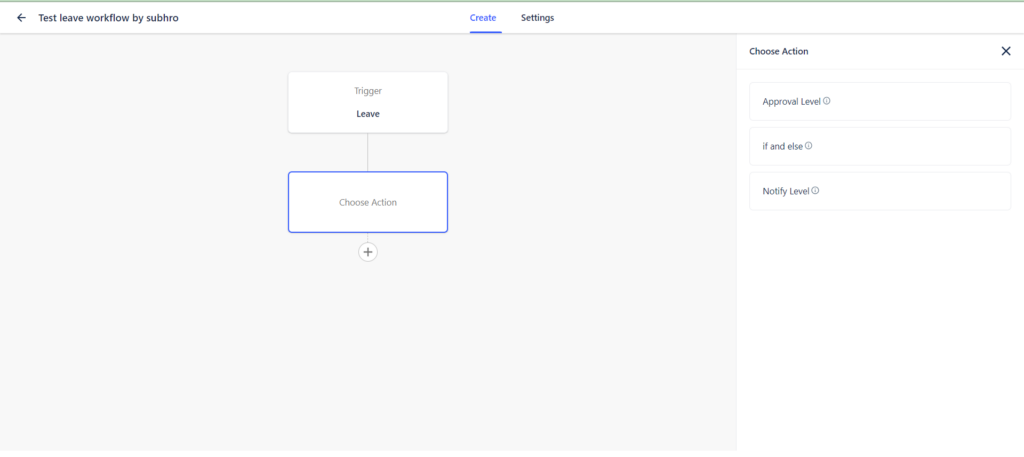
6. We will now choose the first action, so the first action is suggested to be set as “Approval level”, after doing so we will choose the Approver as RM (Example) and choose the level as 1 (which signifies Reporting Manager)
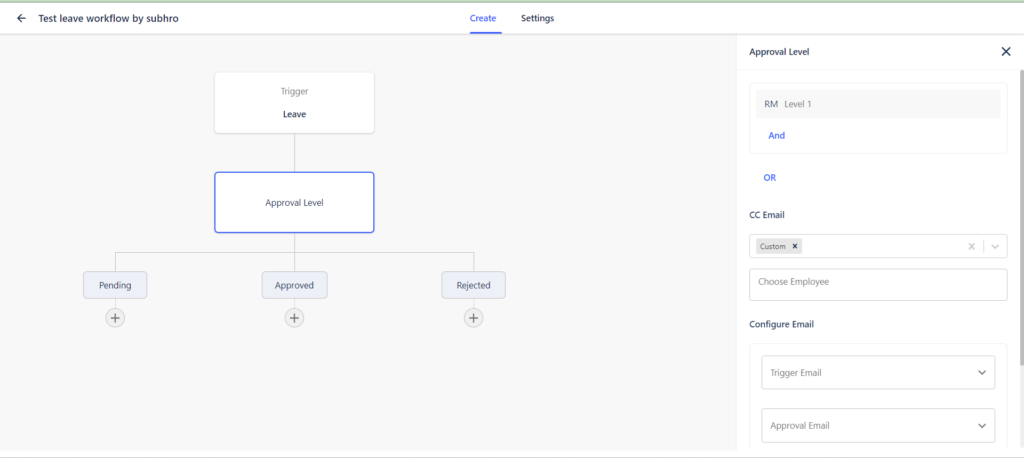
7. Now after the setting the first approver level, we can set another Approver setting ‘AND’ condition or ‘OR’, ‘AND’ means both the approver’s action will be required, ‘OR’ will mean either of the approver’s action will be required
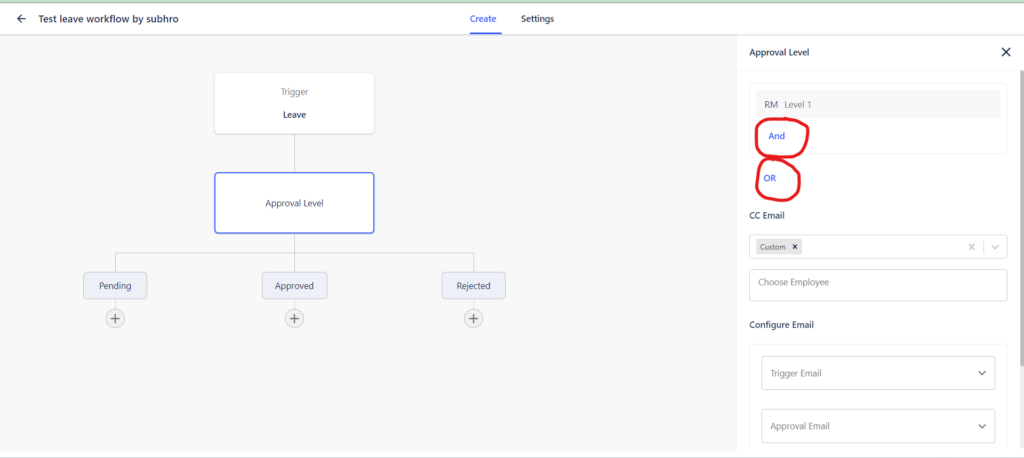
8. For example I will choose ‘OR’ condition and choose the Reporting Manager and level as 2 (which basically signifies to RM of RM)
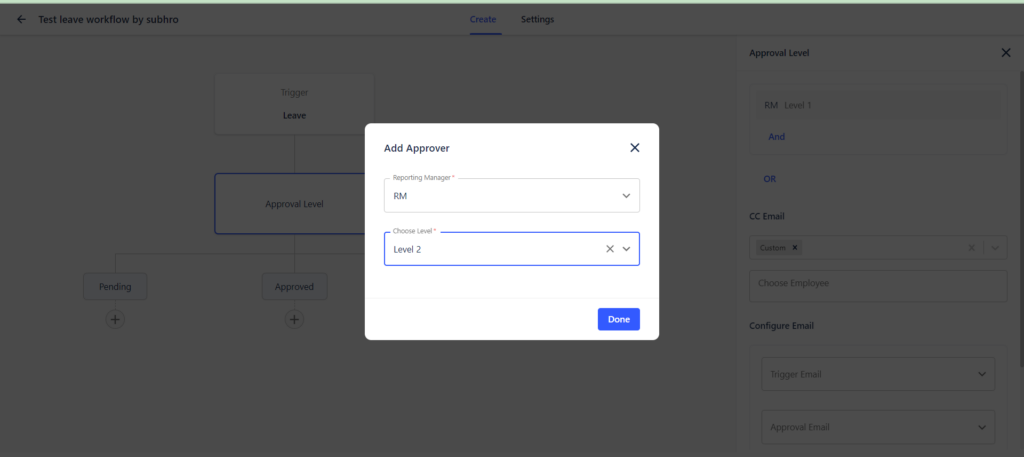
9. Click on “Done” after doing the same we can add another workflow where we can set the set another Approver level or if/else or Notifying criteria

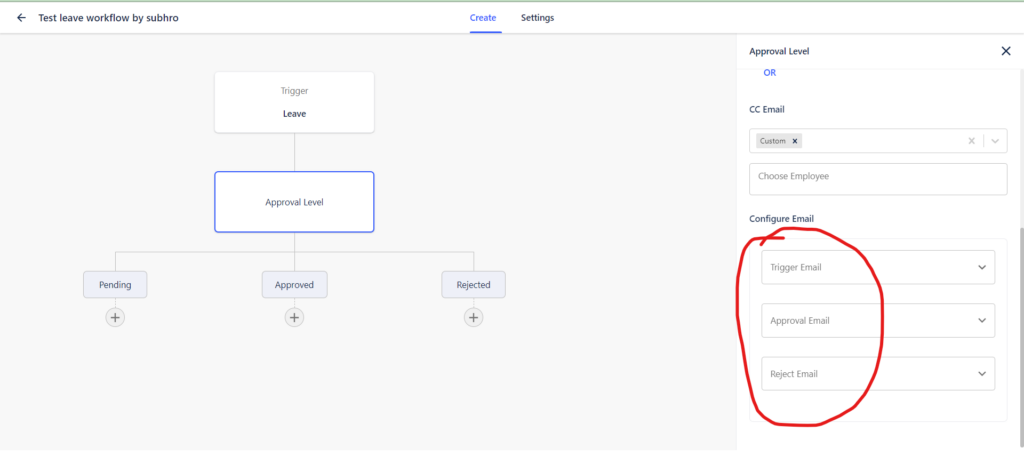
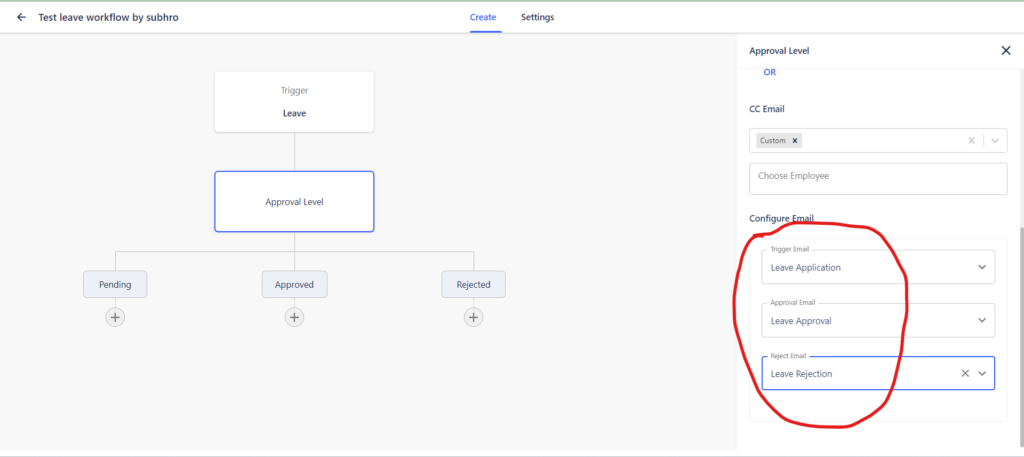
10. We need to make sure that the email template has been tagged on the workflow, the template which are already made in our according to the action like “Trigger”, “Approve” and “Reject”
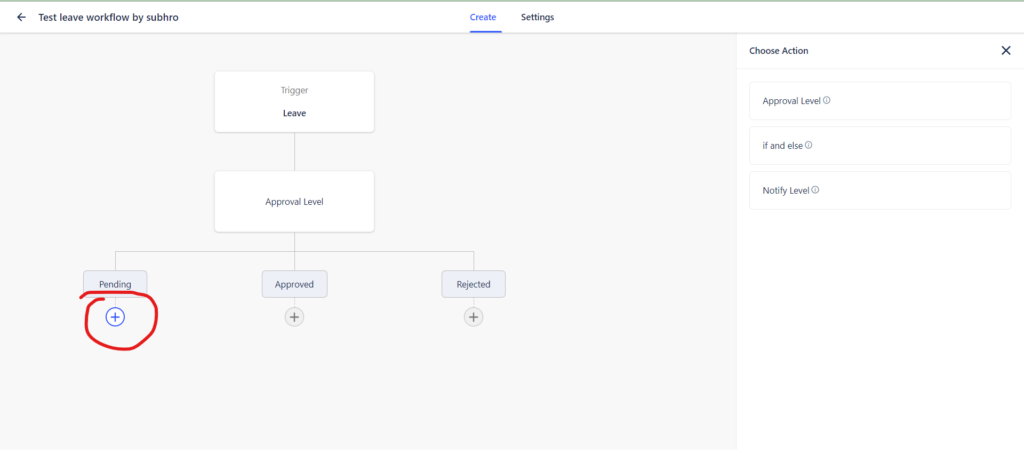
11. If an RM does not respond to the request then click on the Plus sign (+) below the pending branch. And you can add as many approvers as you like. You can follow the same steps in case if someone rejects the request.
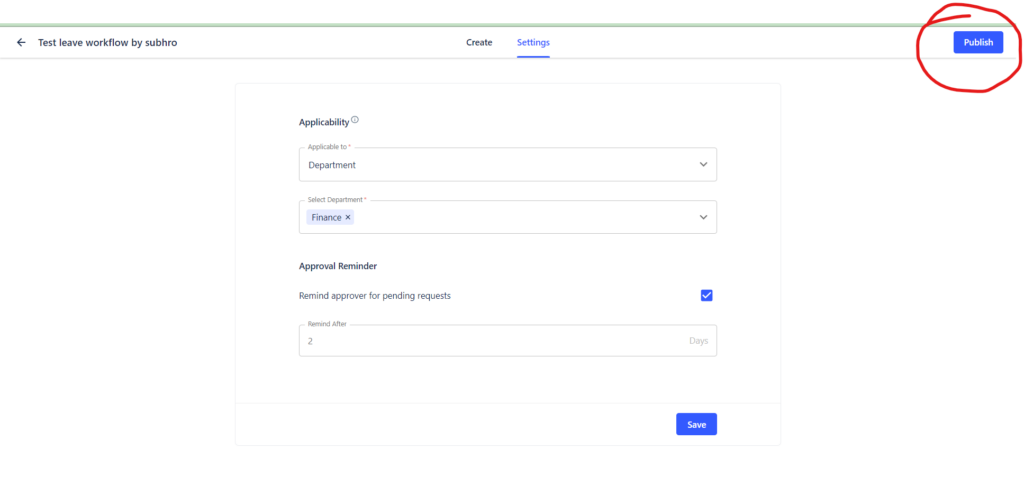
12. Once your workflow is created, you can also decide which workflow is applicable to which department/designation/location or even an employee. You can do so by clicking on the “Settings” tab on the top of the screen.
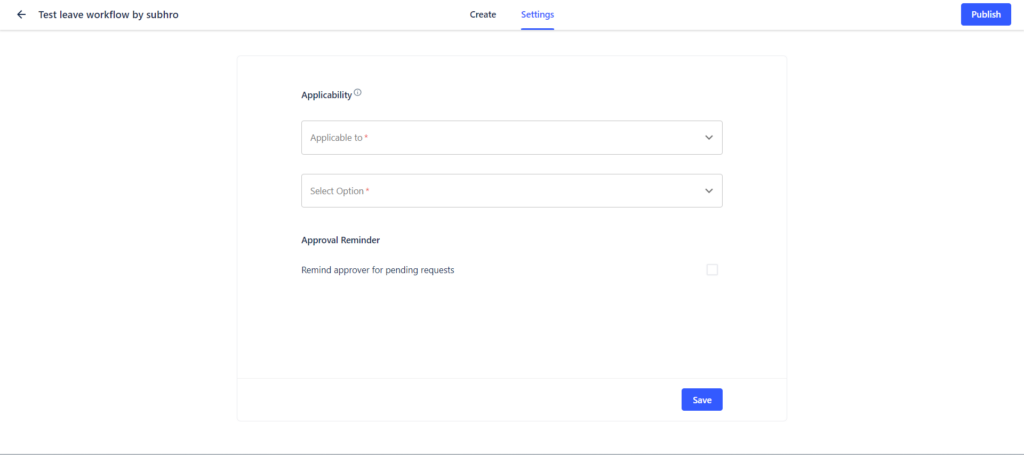
13. Your workflow will be successfully published as soon as we click on Publish. You can create different types of workflows using the same steps.